Exercise 05 - Azure API Center for MCP Discovery
Introduction
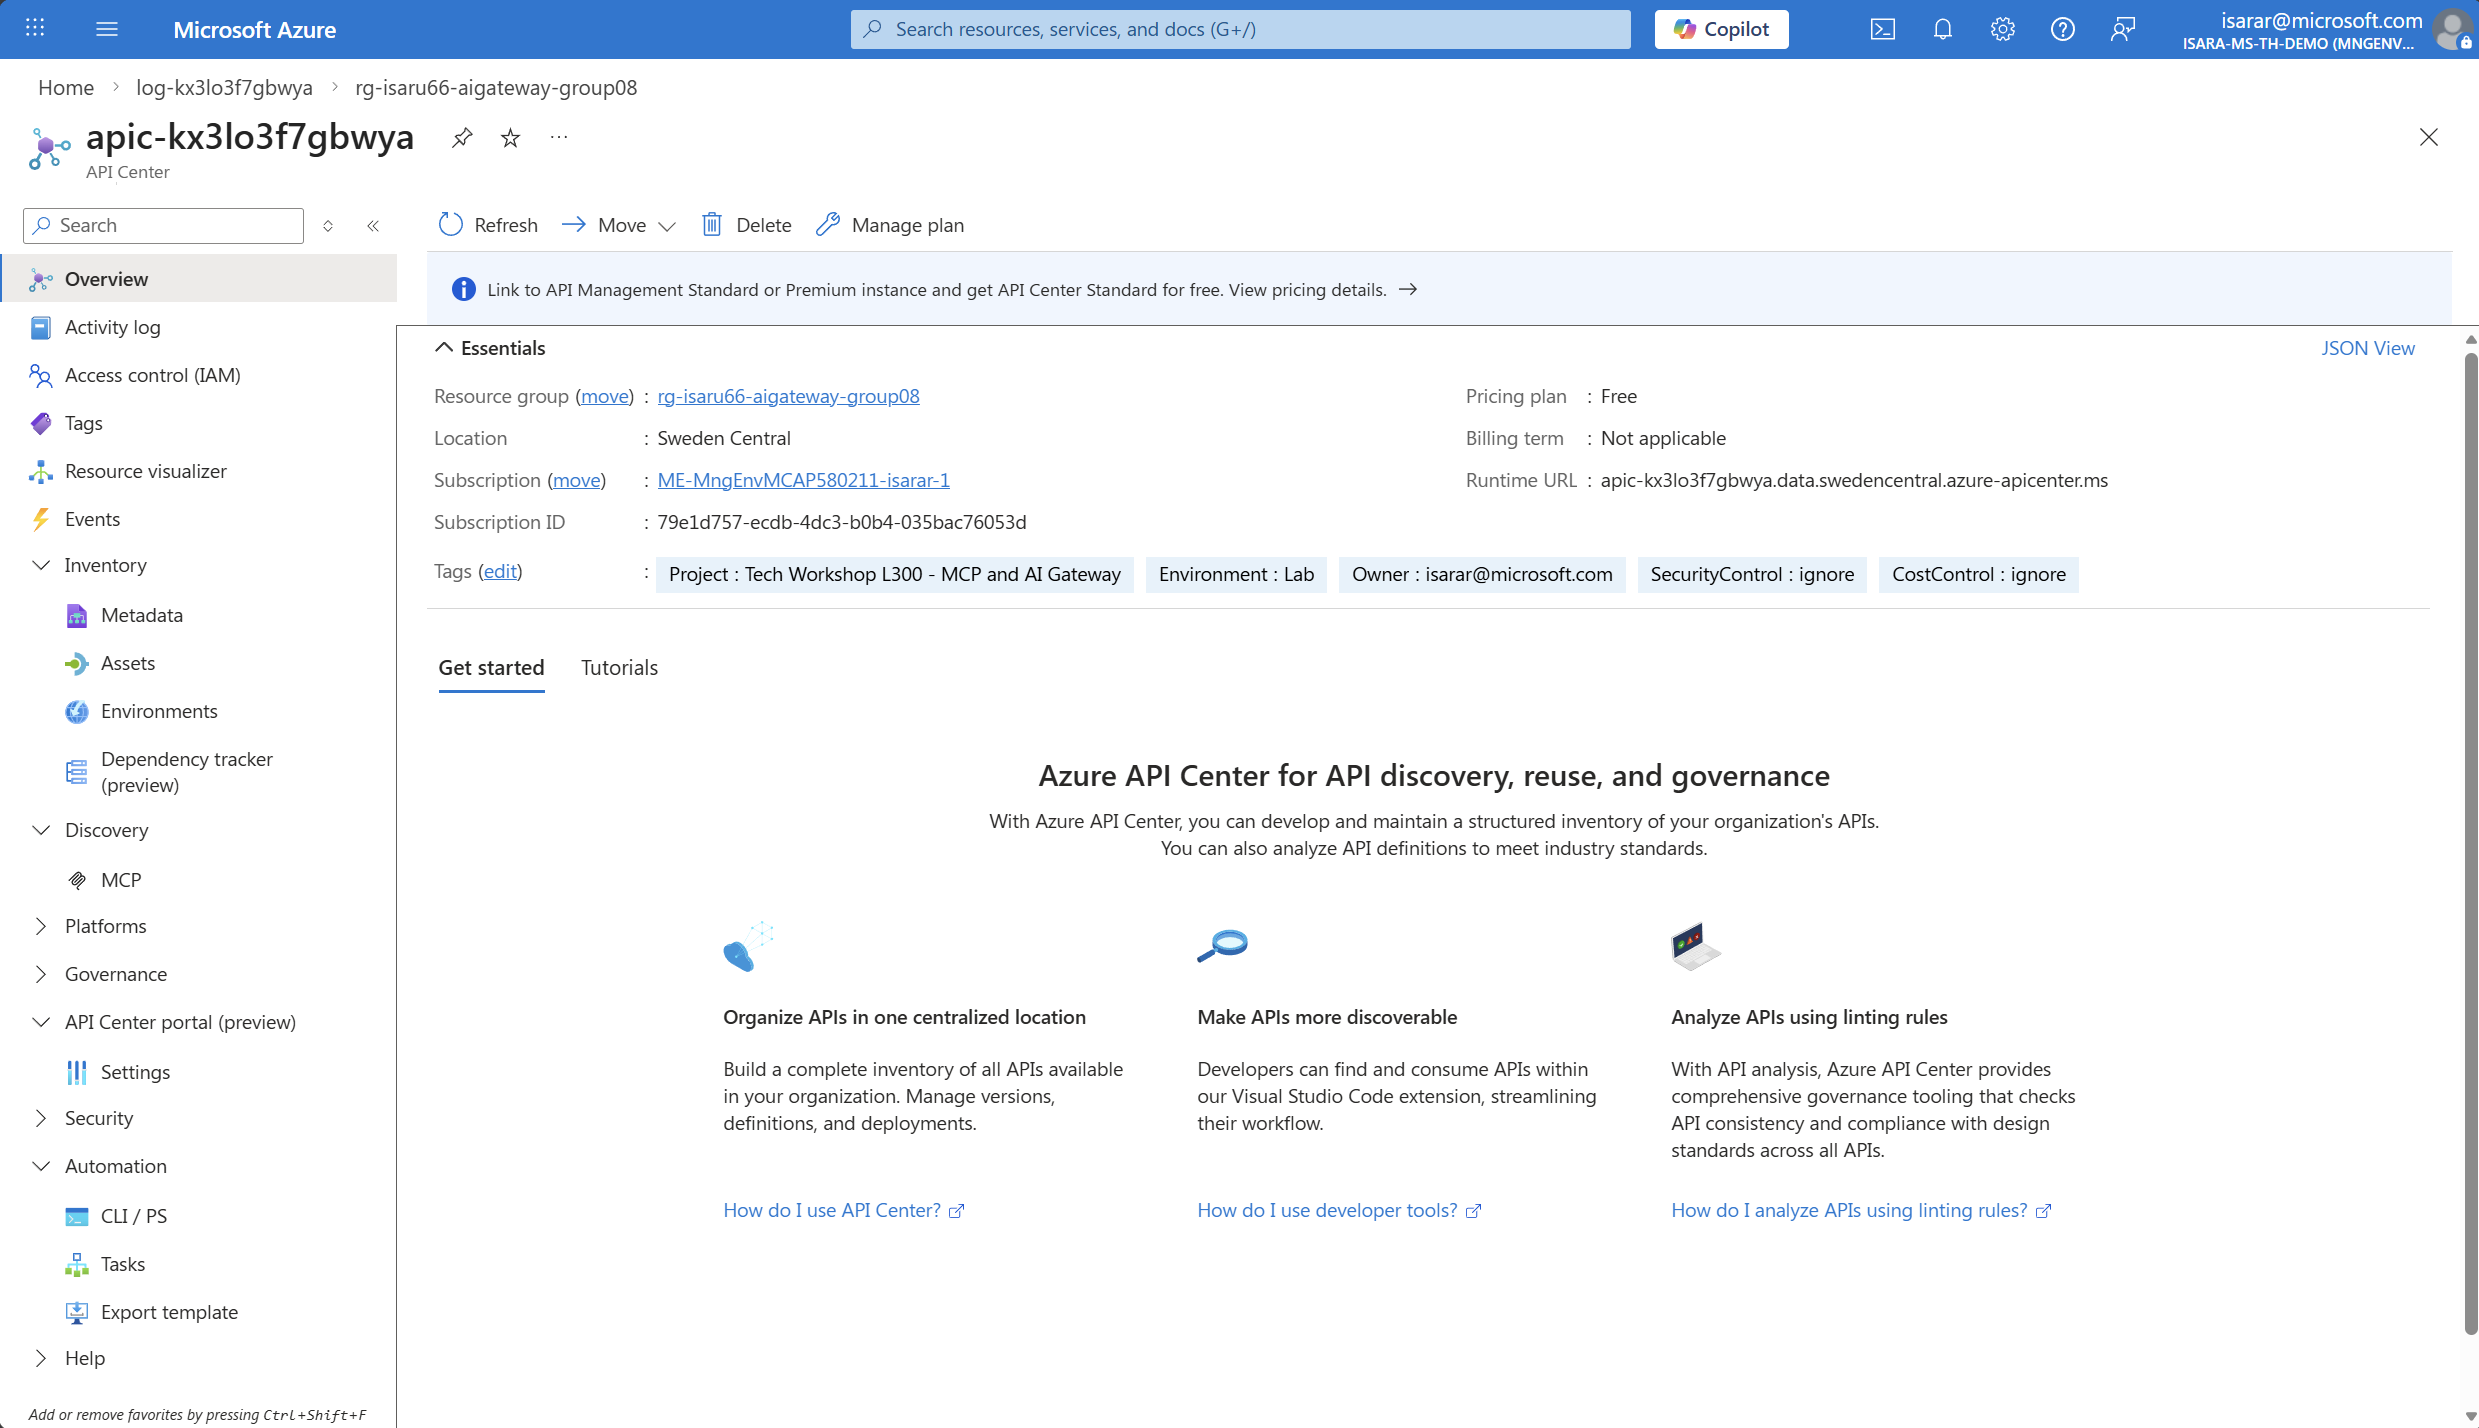
Azure API Center provides a centralized inventory for discovering and managing APIs across your organization, including Model Context Protocol (MCP) servers. MCP servers expose backend APIs and data sources in a standardized way to AI agents and models. By registering your MCP servers in API Center and publishing the API Center portal, you enable developers and stakeholders to easily discover and consume these resources.
Description
In this exercise, you will register MCP servers in your Azure API Center inventory and publish the API Center portal to enable discovery and consumption. You will learn how to manually register MCP servers, use partner MCP servers from the curated list, and configure the portal for public access.
Success Criteria
- You have registered at least one MCP server in your API Center inventory.
- You have configured and published the API Center portal.
- You can access the API Center portal and discover registered MCP servers.
Learning Resources
- Register and discover remote MCP servers
- Set up your API Center portal
- About MCP servers in API Management
Key Tasks
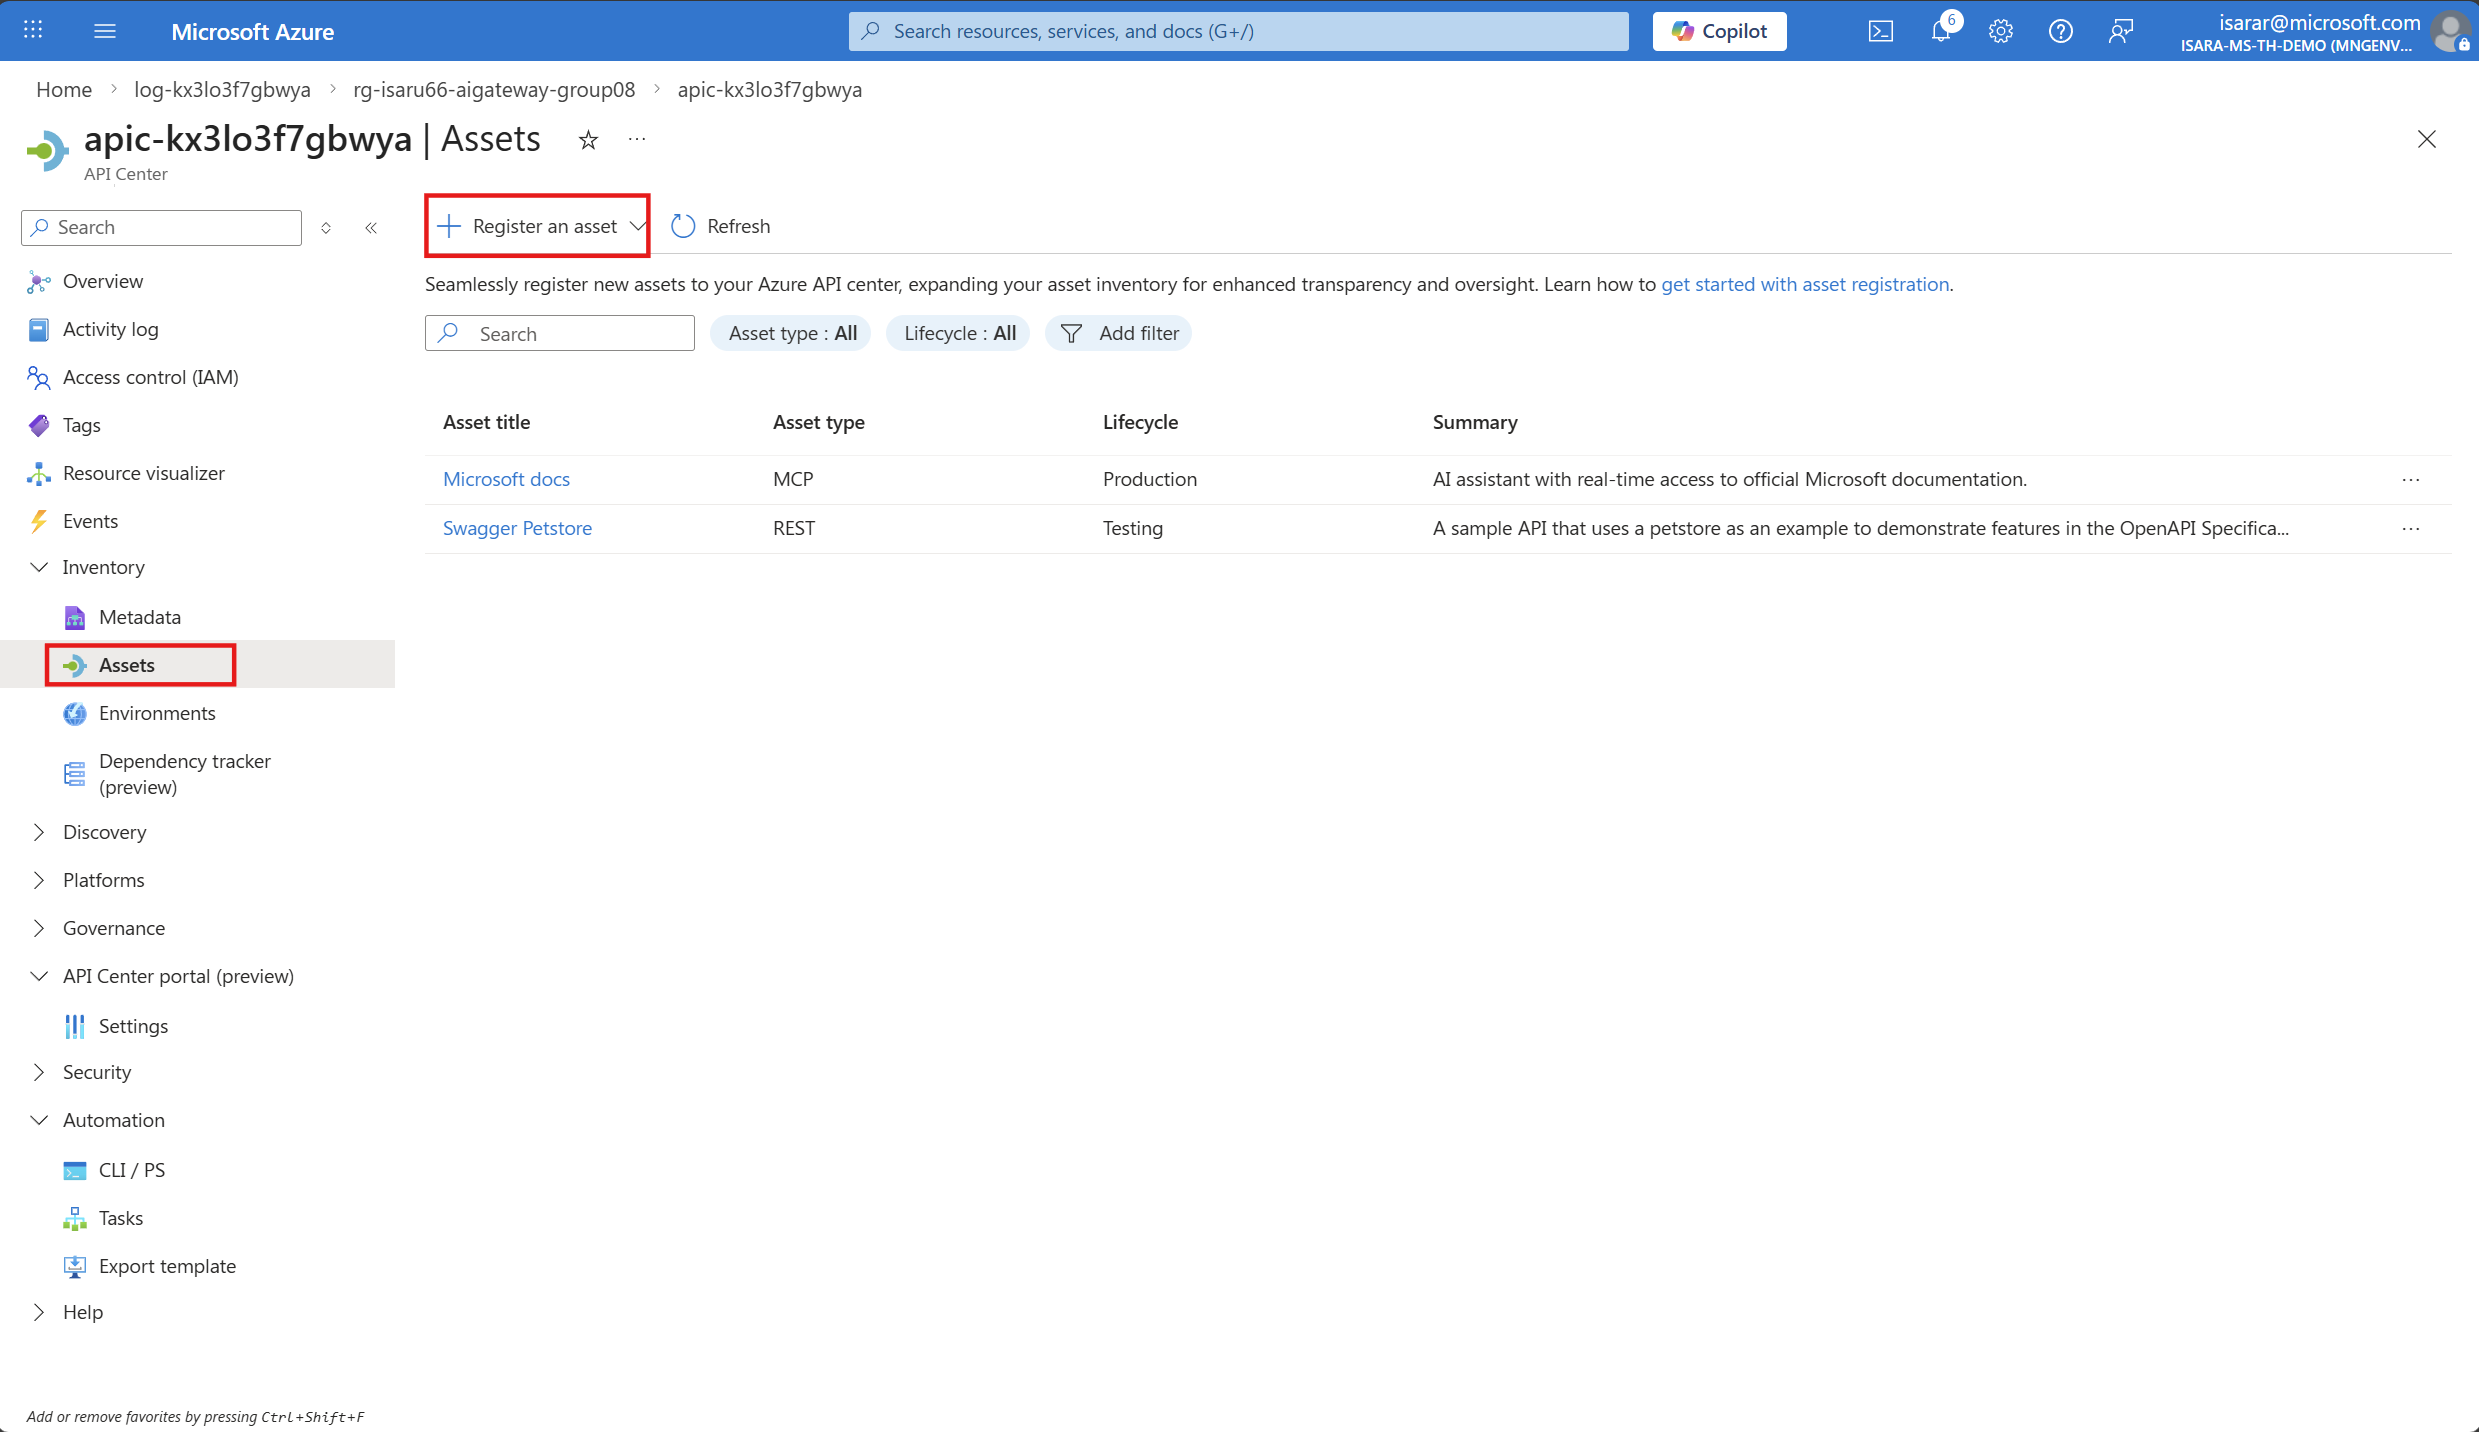
01: Manually register an MCP server in Azure API Center
In addition to partner MCP servers, you can manually register your own MCP servers in the API inventory by specifying the API type as MCP.
Expand this section to view the solution
Create the MCP API entry
- In your API Center instance, select Inventory -> Asset from the left menu.
- Select + Register an Asset to create a new MCP entry.
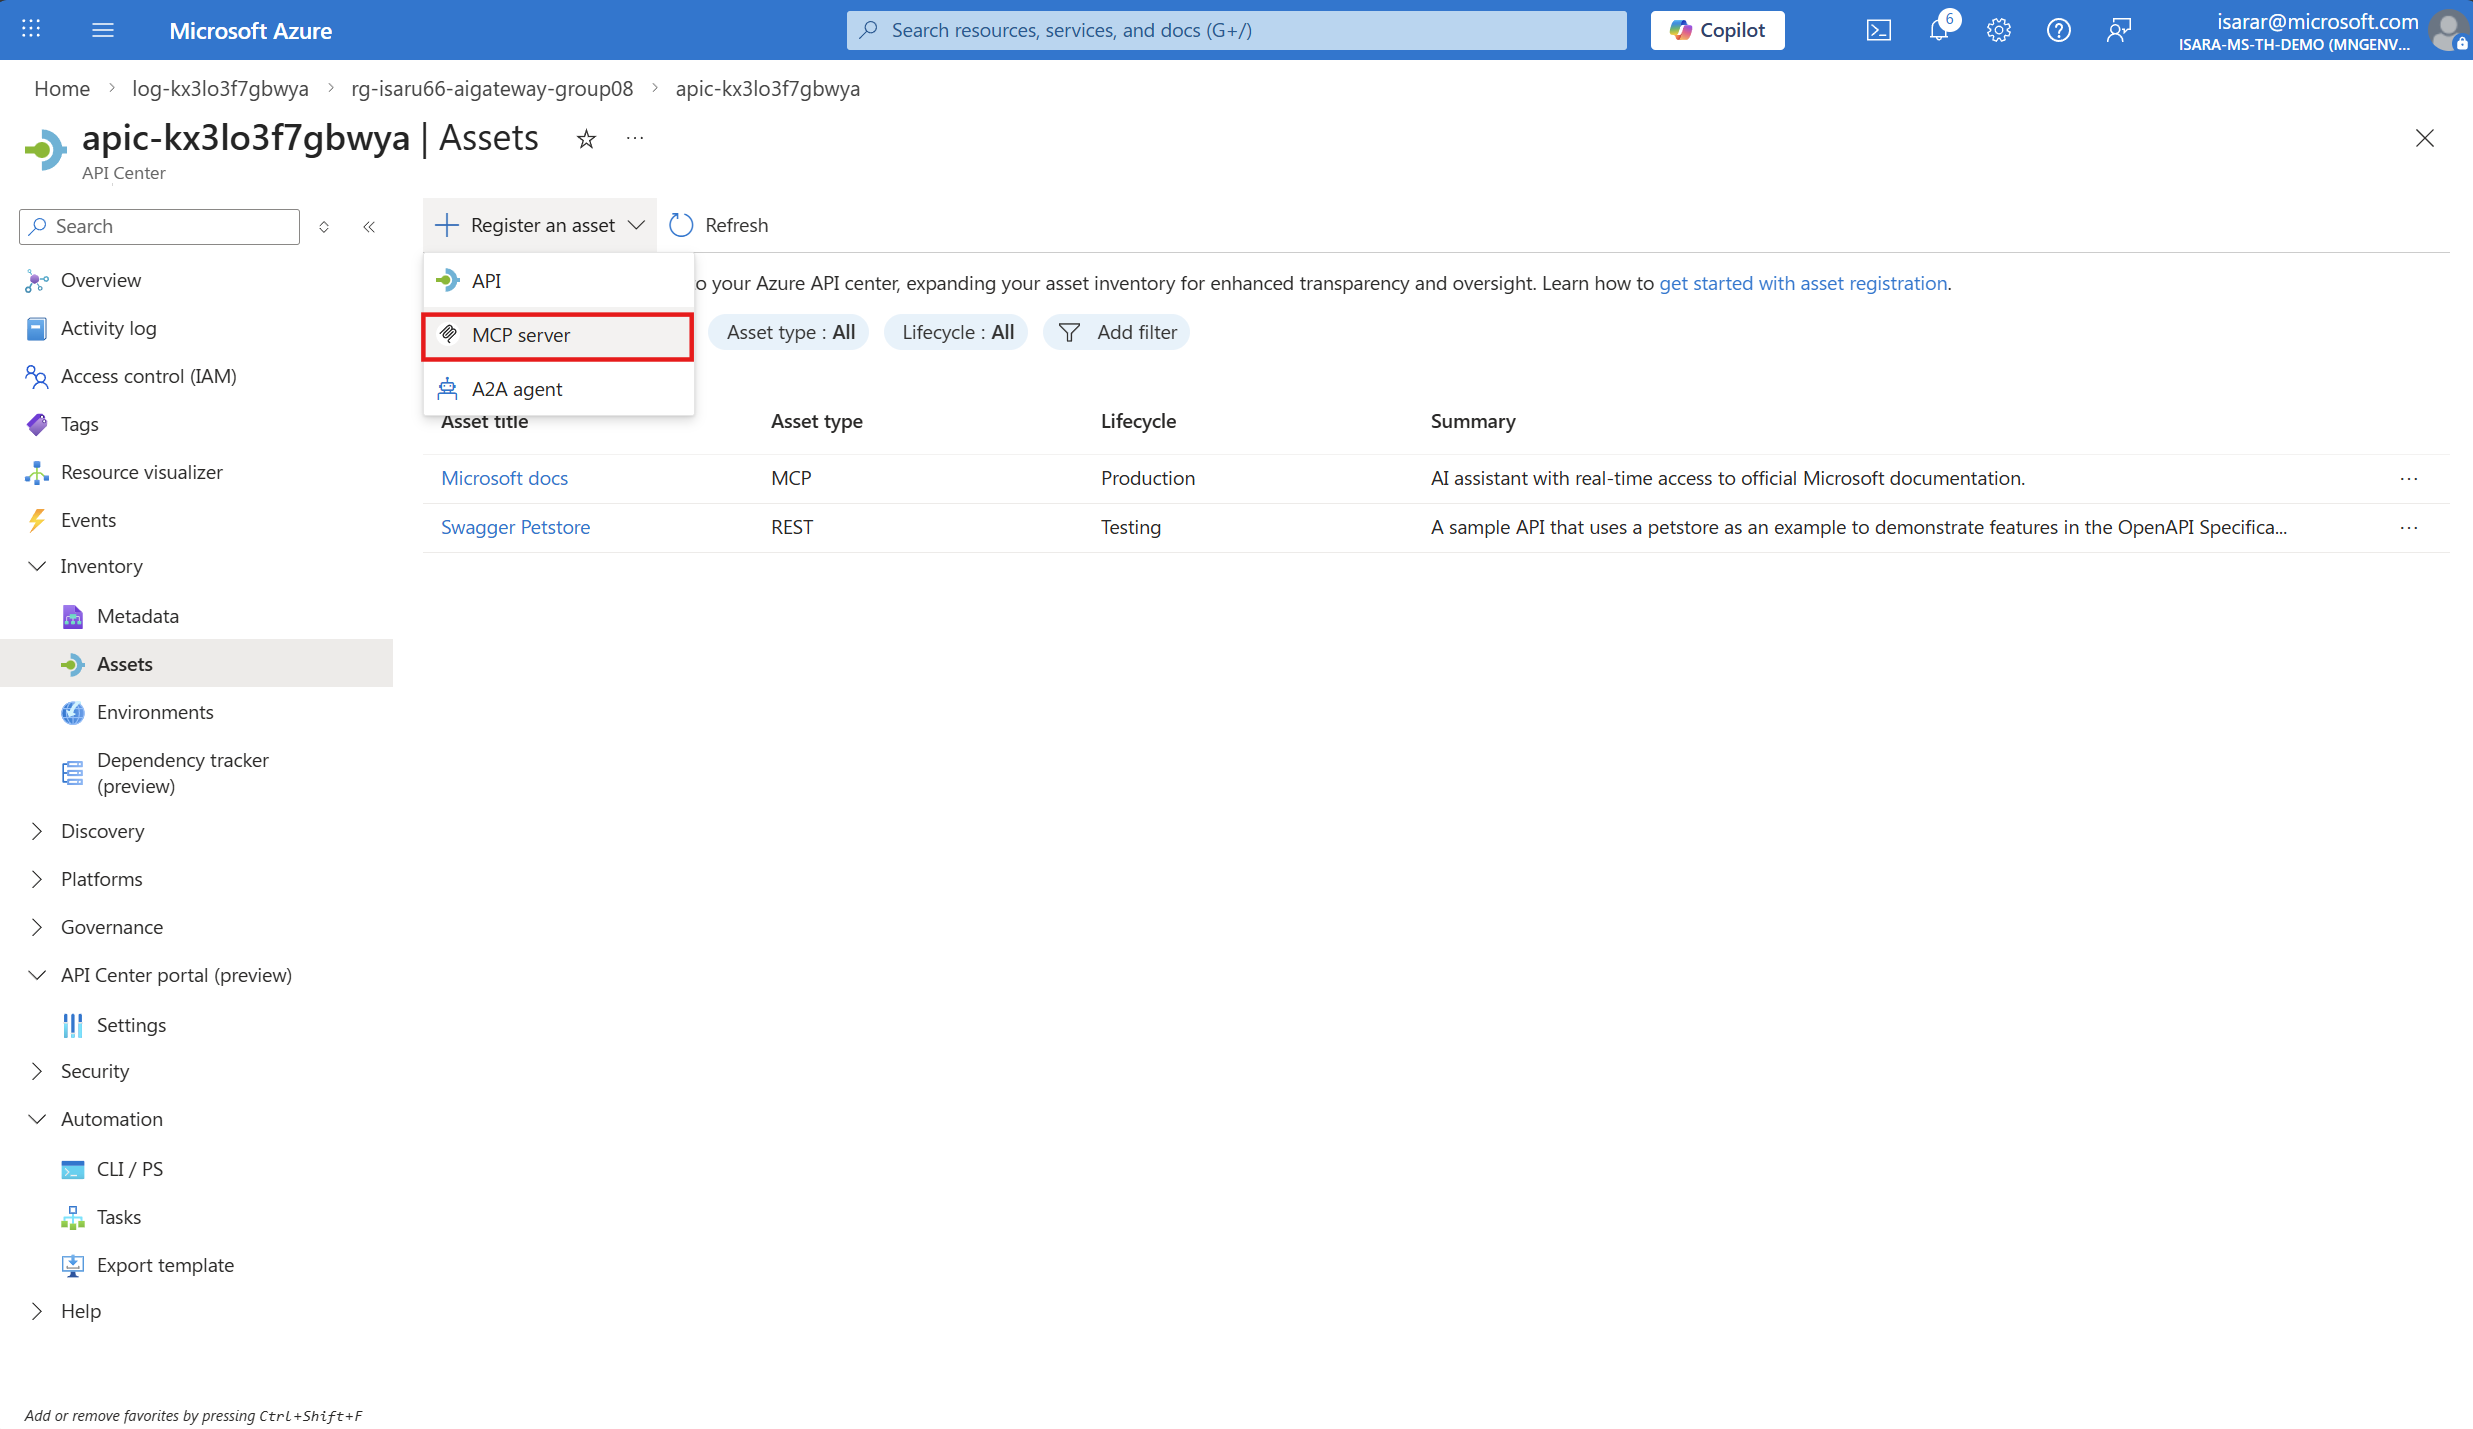
- Select Register an Asset -> MCP to register the API.
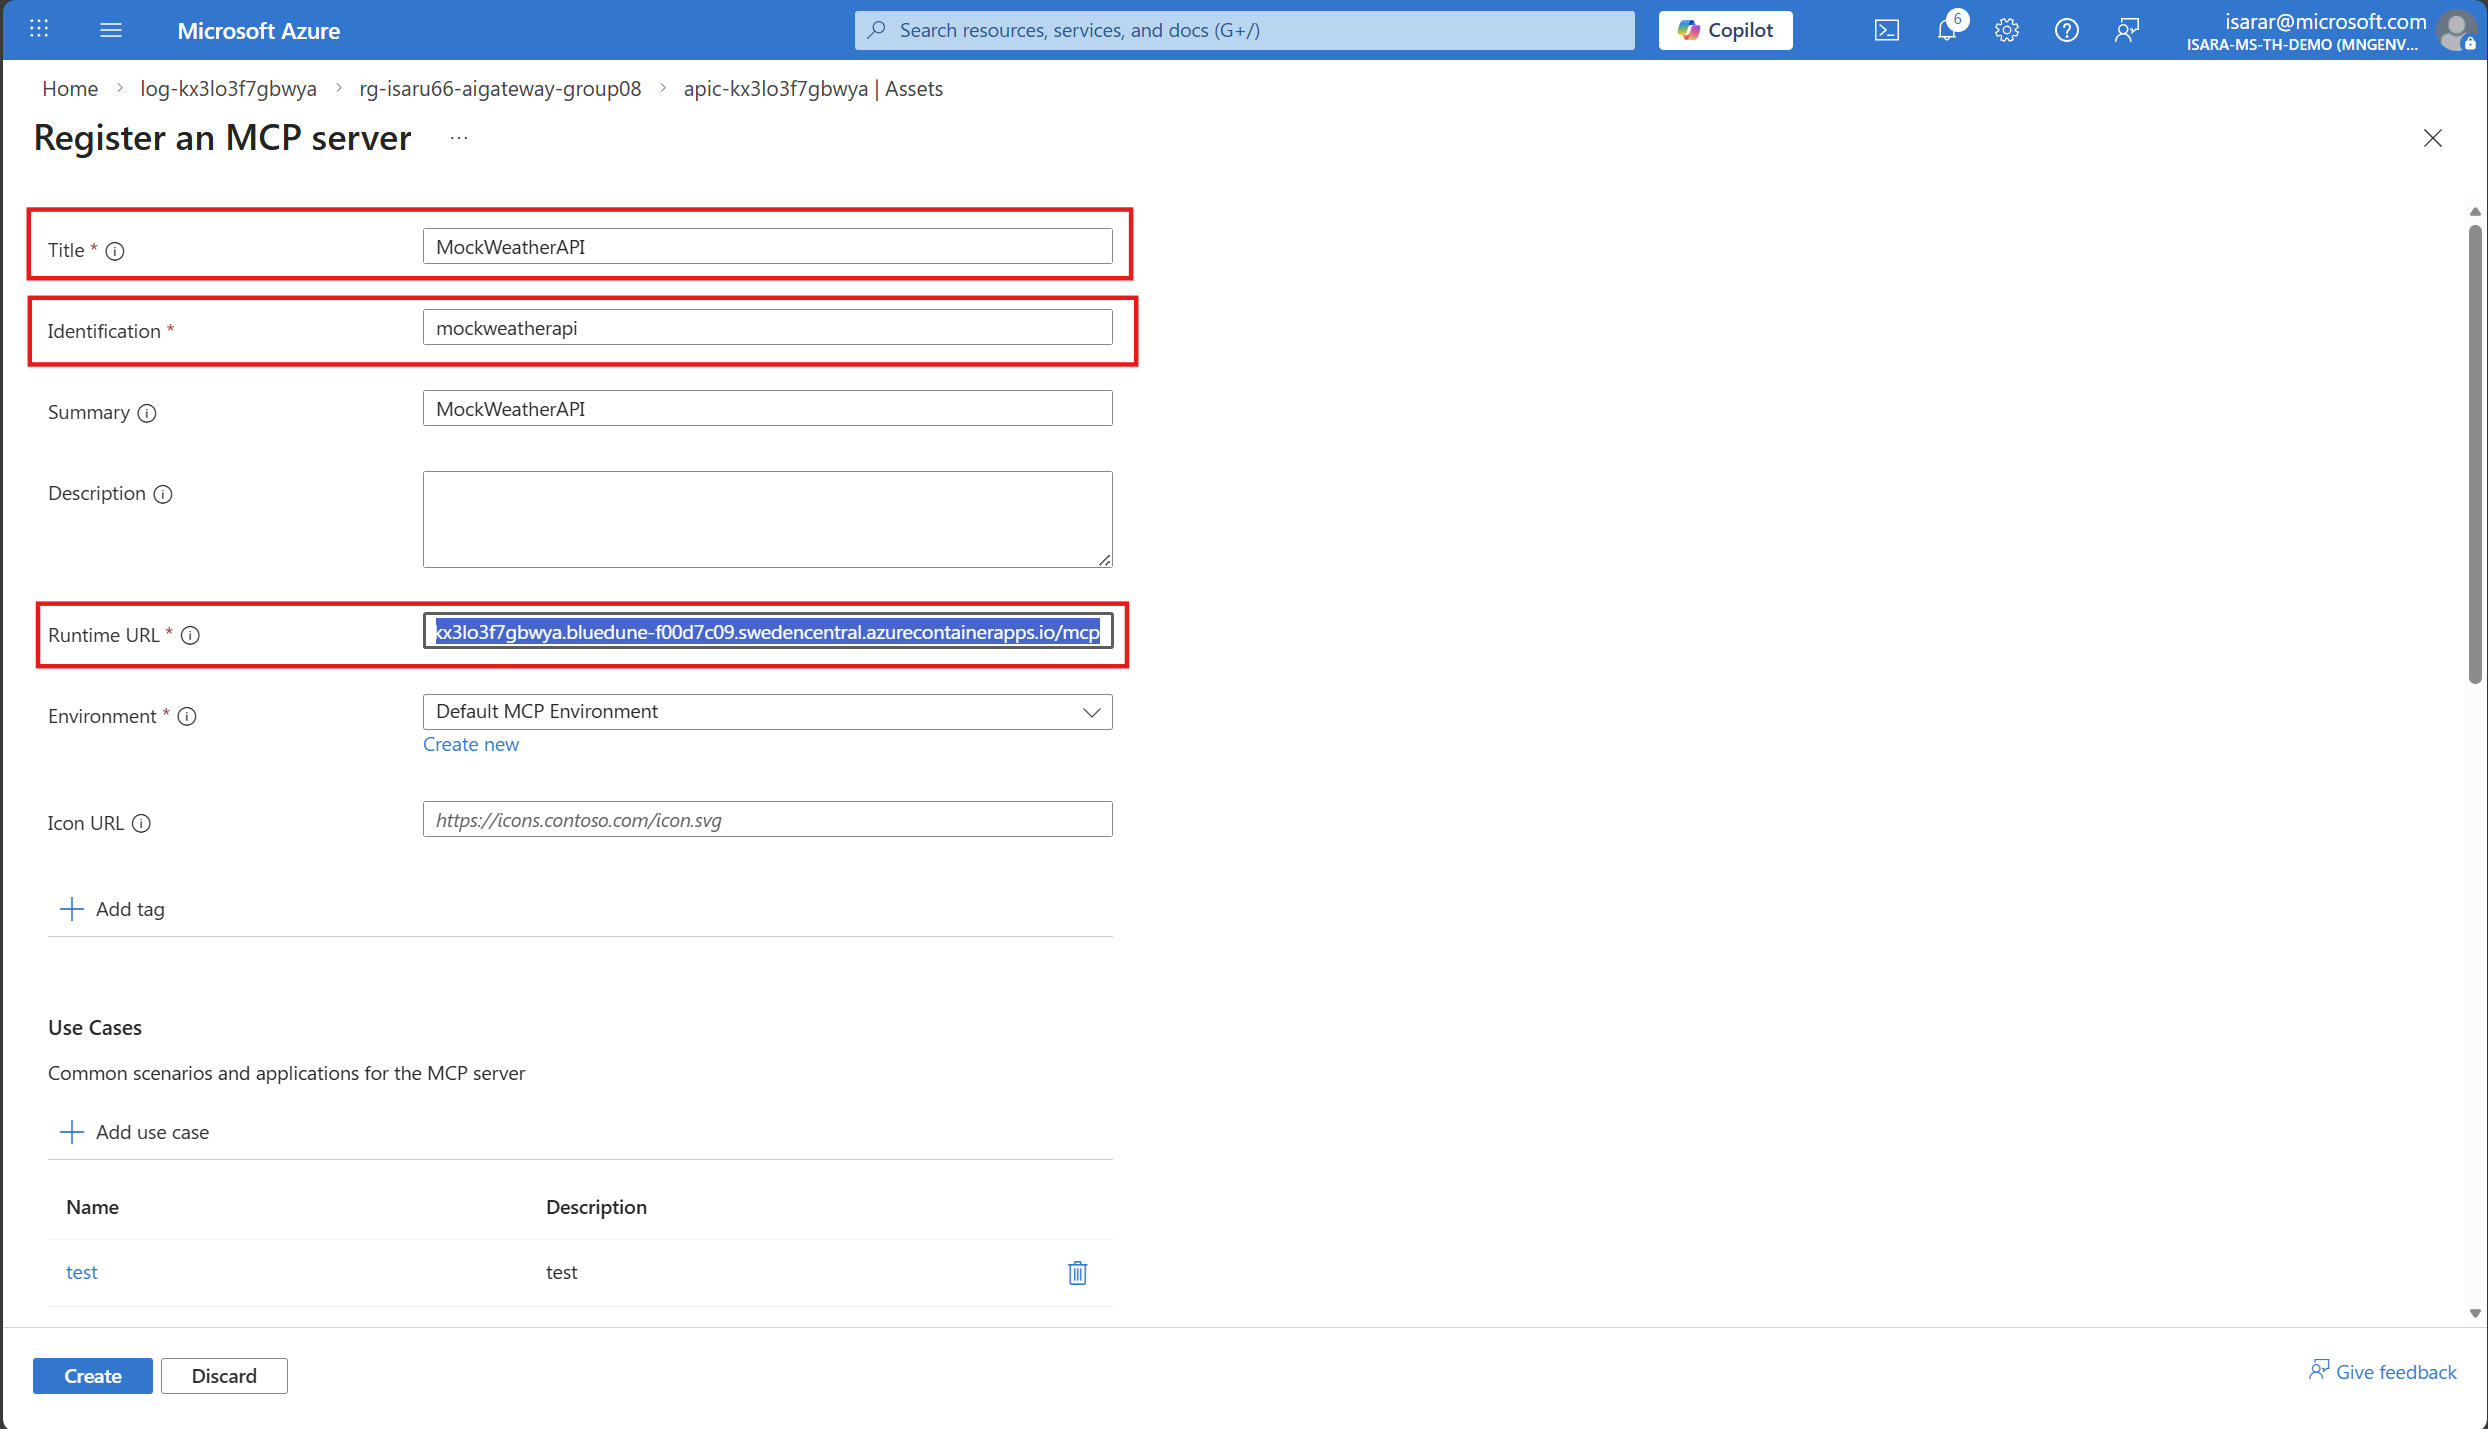
Register an MCP Server
- Register the MCP server with the following details:
- Title: Enter a descriptive name (e.g., “MockWeatherAPI”)
- Identification: Enter a unique identifier (e.g., “mockweatherapi”)
- Summary: Enter a brief summary (e.g., “MockWeatherAPI”)
- Runtime URL: Enter the runtime URL for the MCP server (e.g.,
https://iosai7piovya.bluedesim-fkk07cd9.swedencentral.azurecontainerapps.io/mcp) - Environment: Select the environment (e.g., “Default MCP Environment”)
- Icon URL: (Optional) Enter an icon URL for the MCP server
03: Configure and publish the API Center portal
After registering your MCP servers, publish the API Center portal to enable discovery and consumption by developers and stakeholders in your organization.
Expand this section to view the solution
Publish API Center
-
In the Azure portal, navigate to your API Center instance.
- In the left menu, select API Center portal > Settings.
-
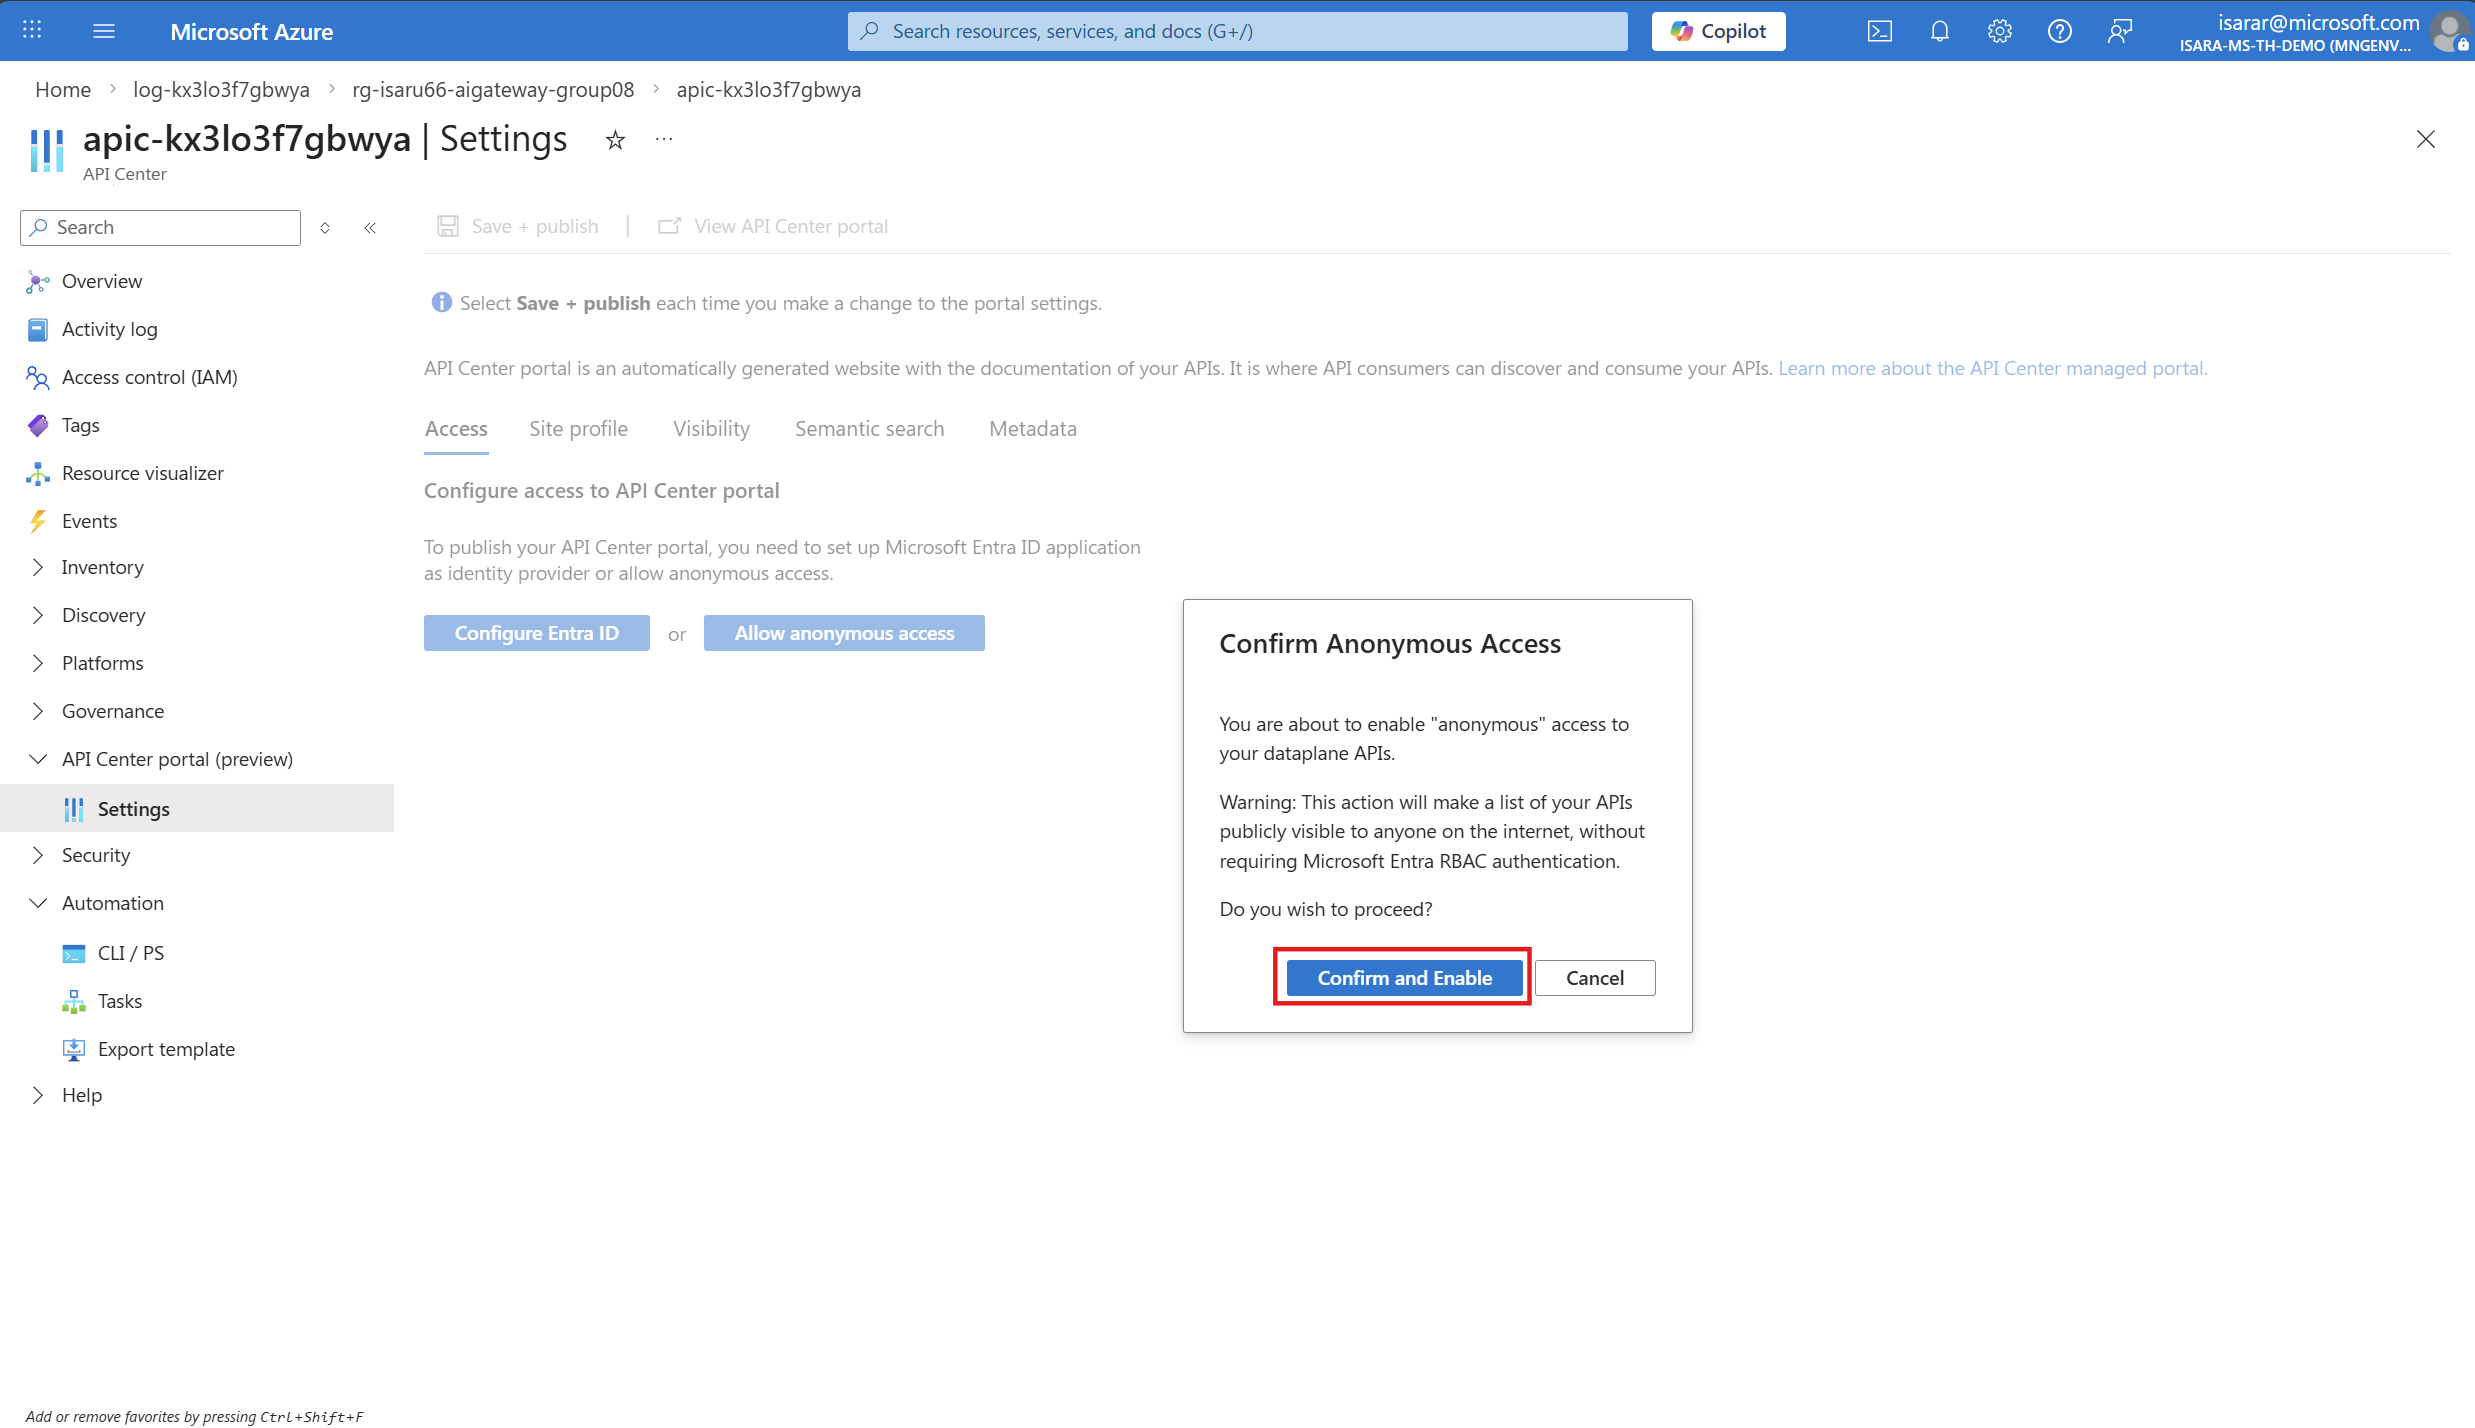
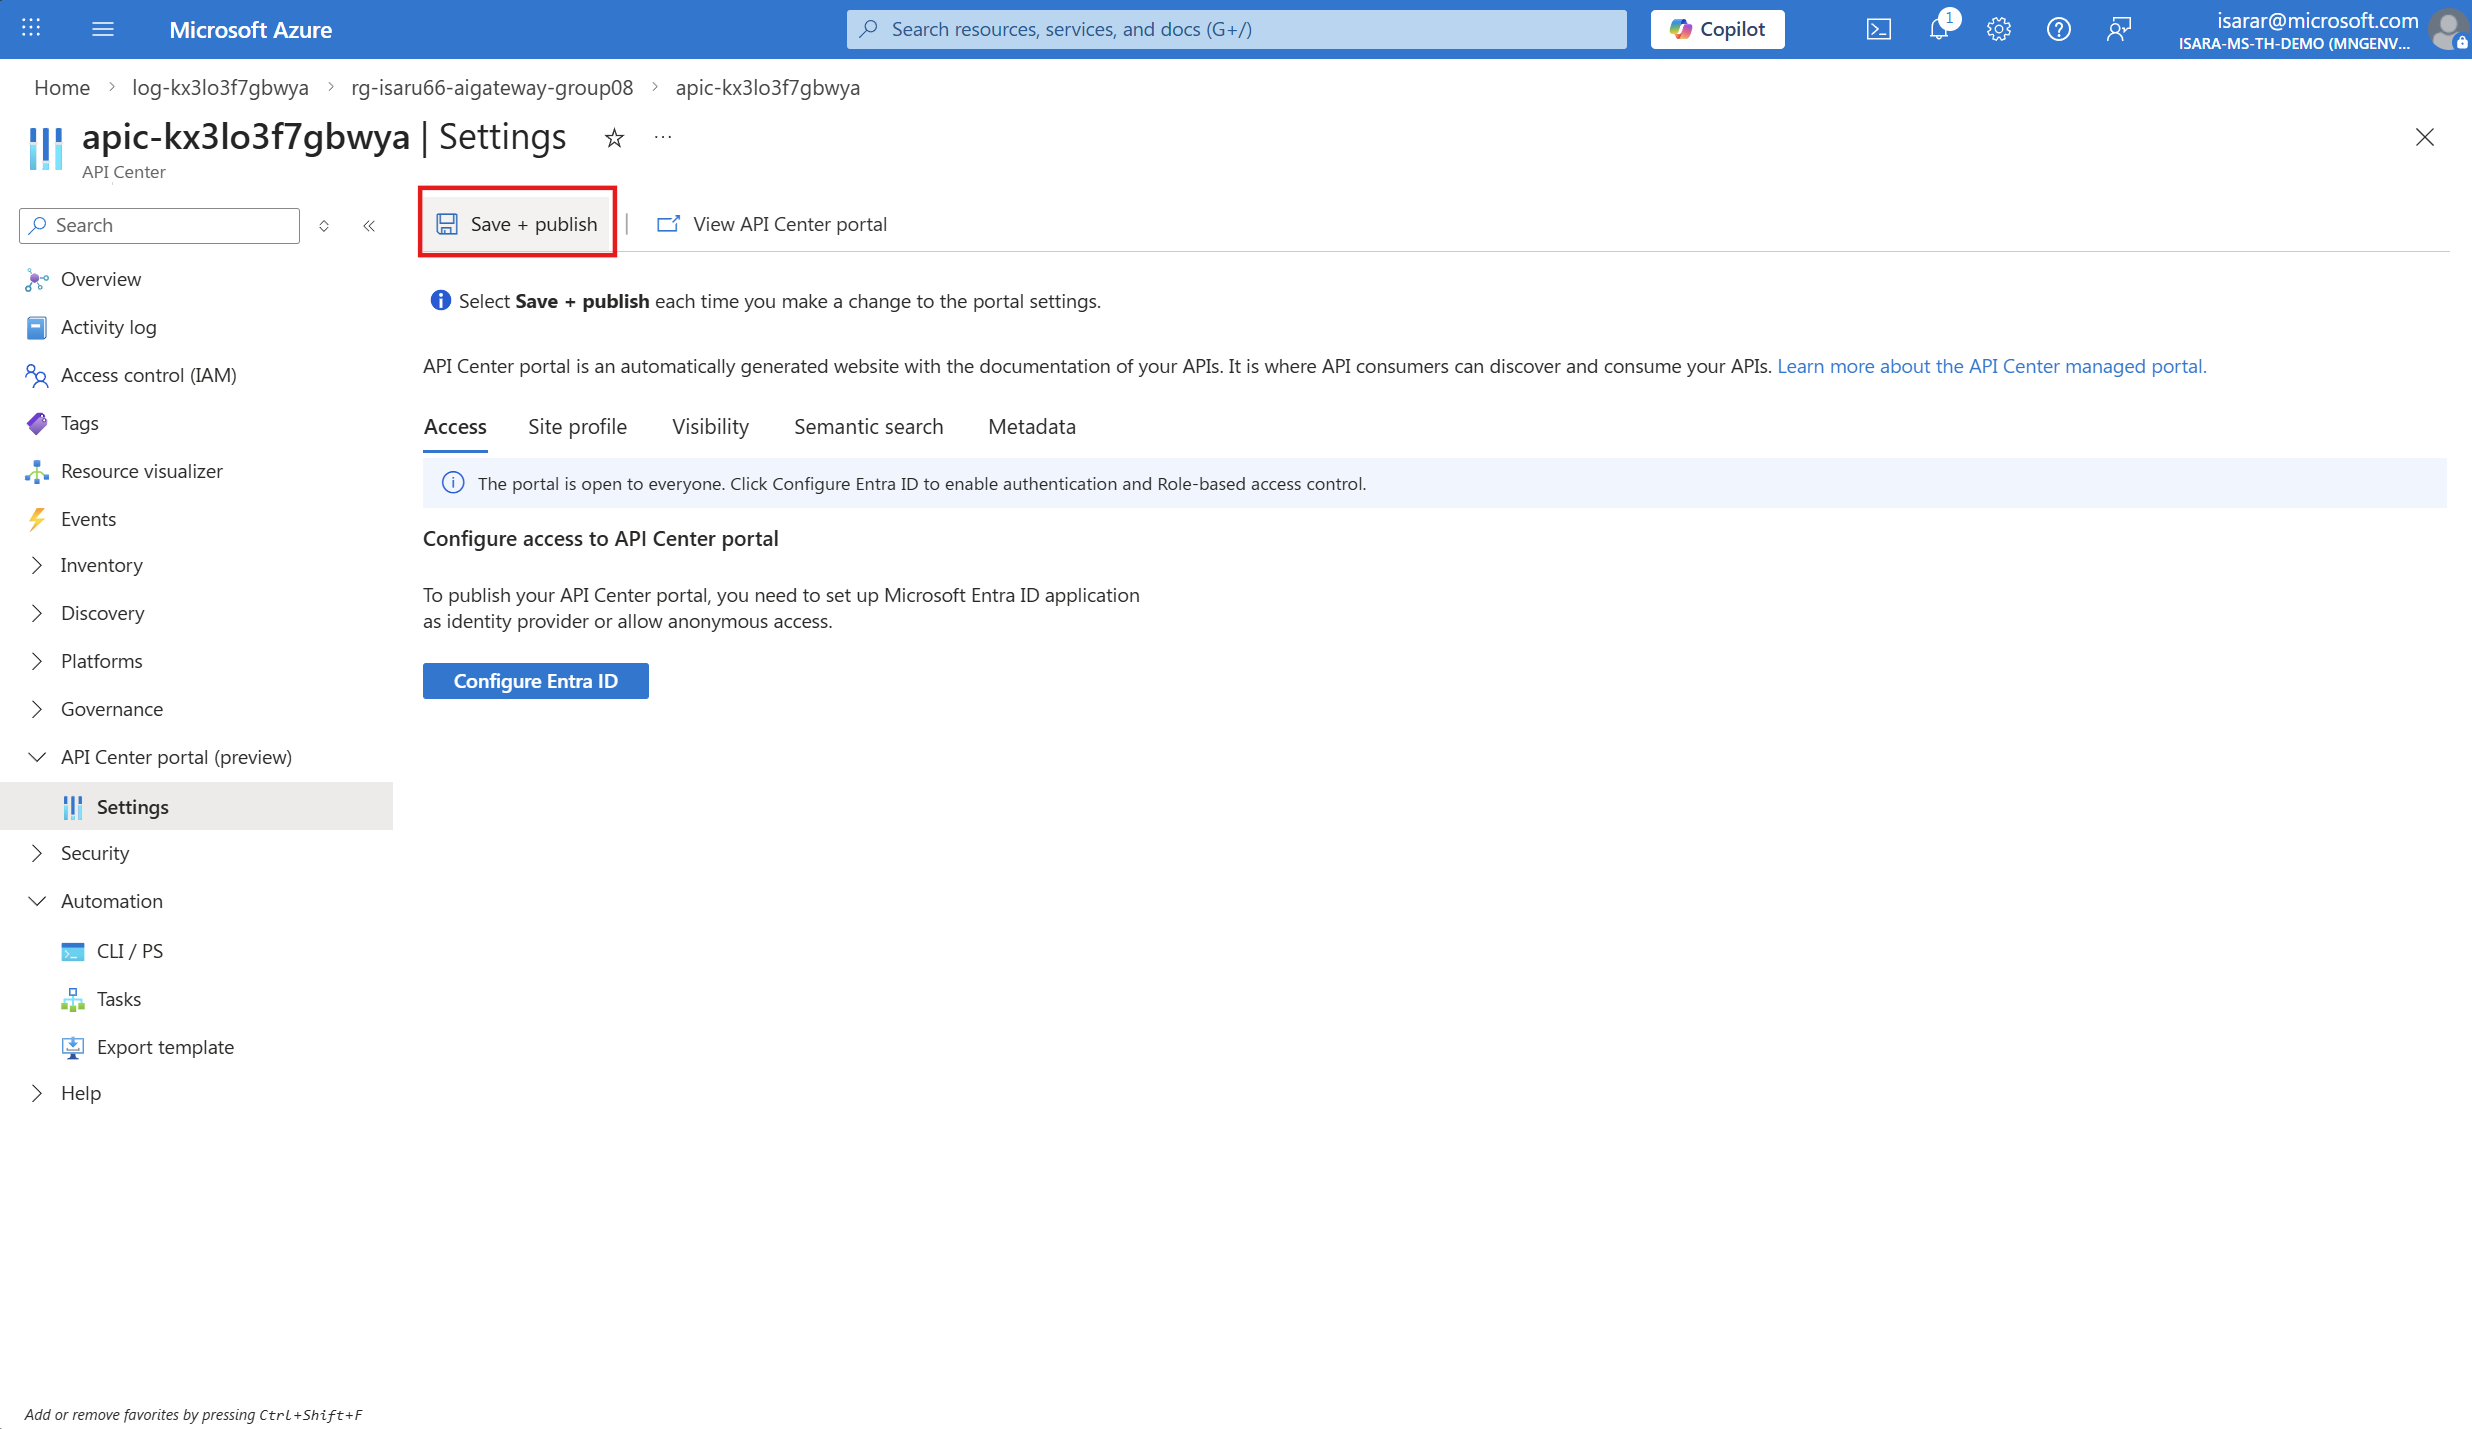
On the Access Tab tab, select Allow Annonymous Access.

-
click Confirm and Enable.
-
click Save + Publish.
-
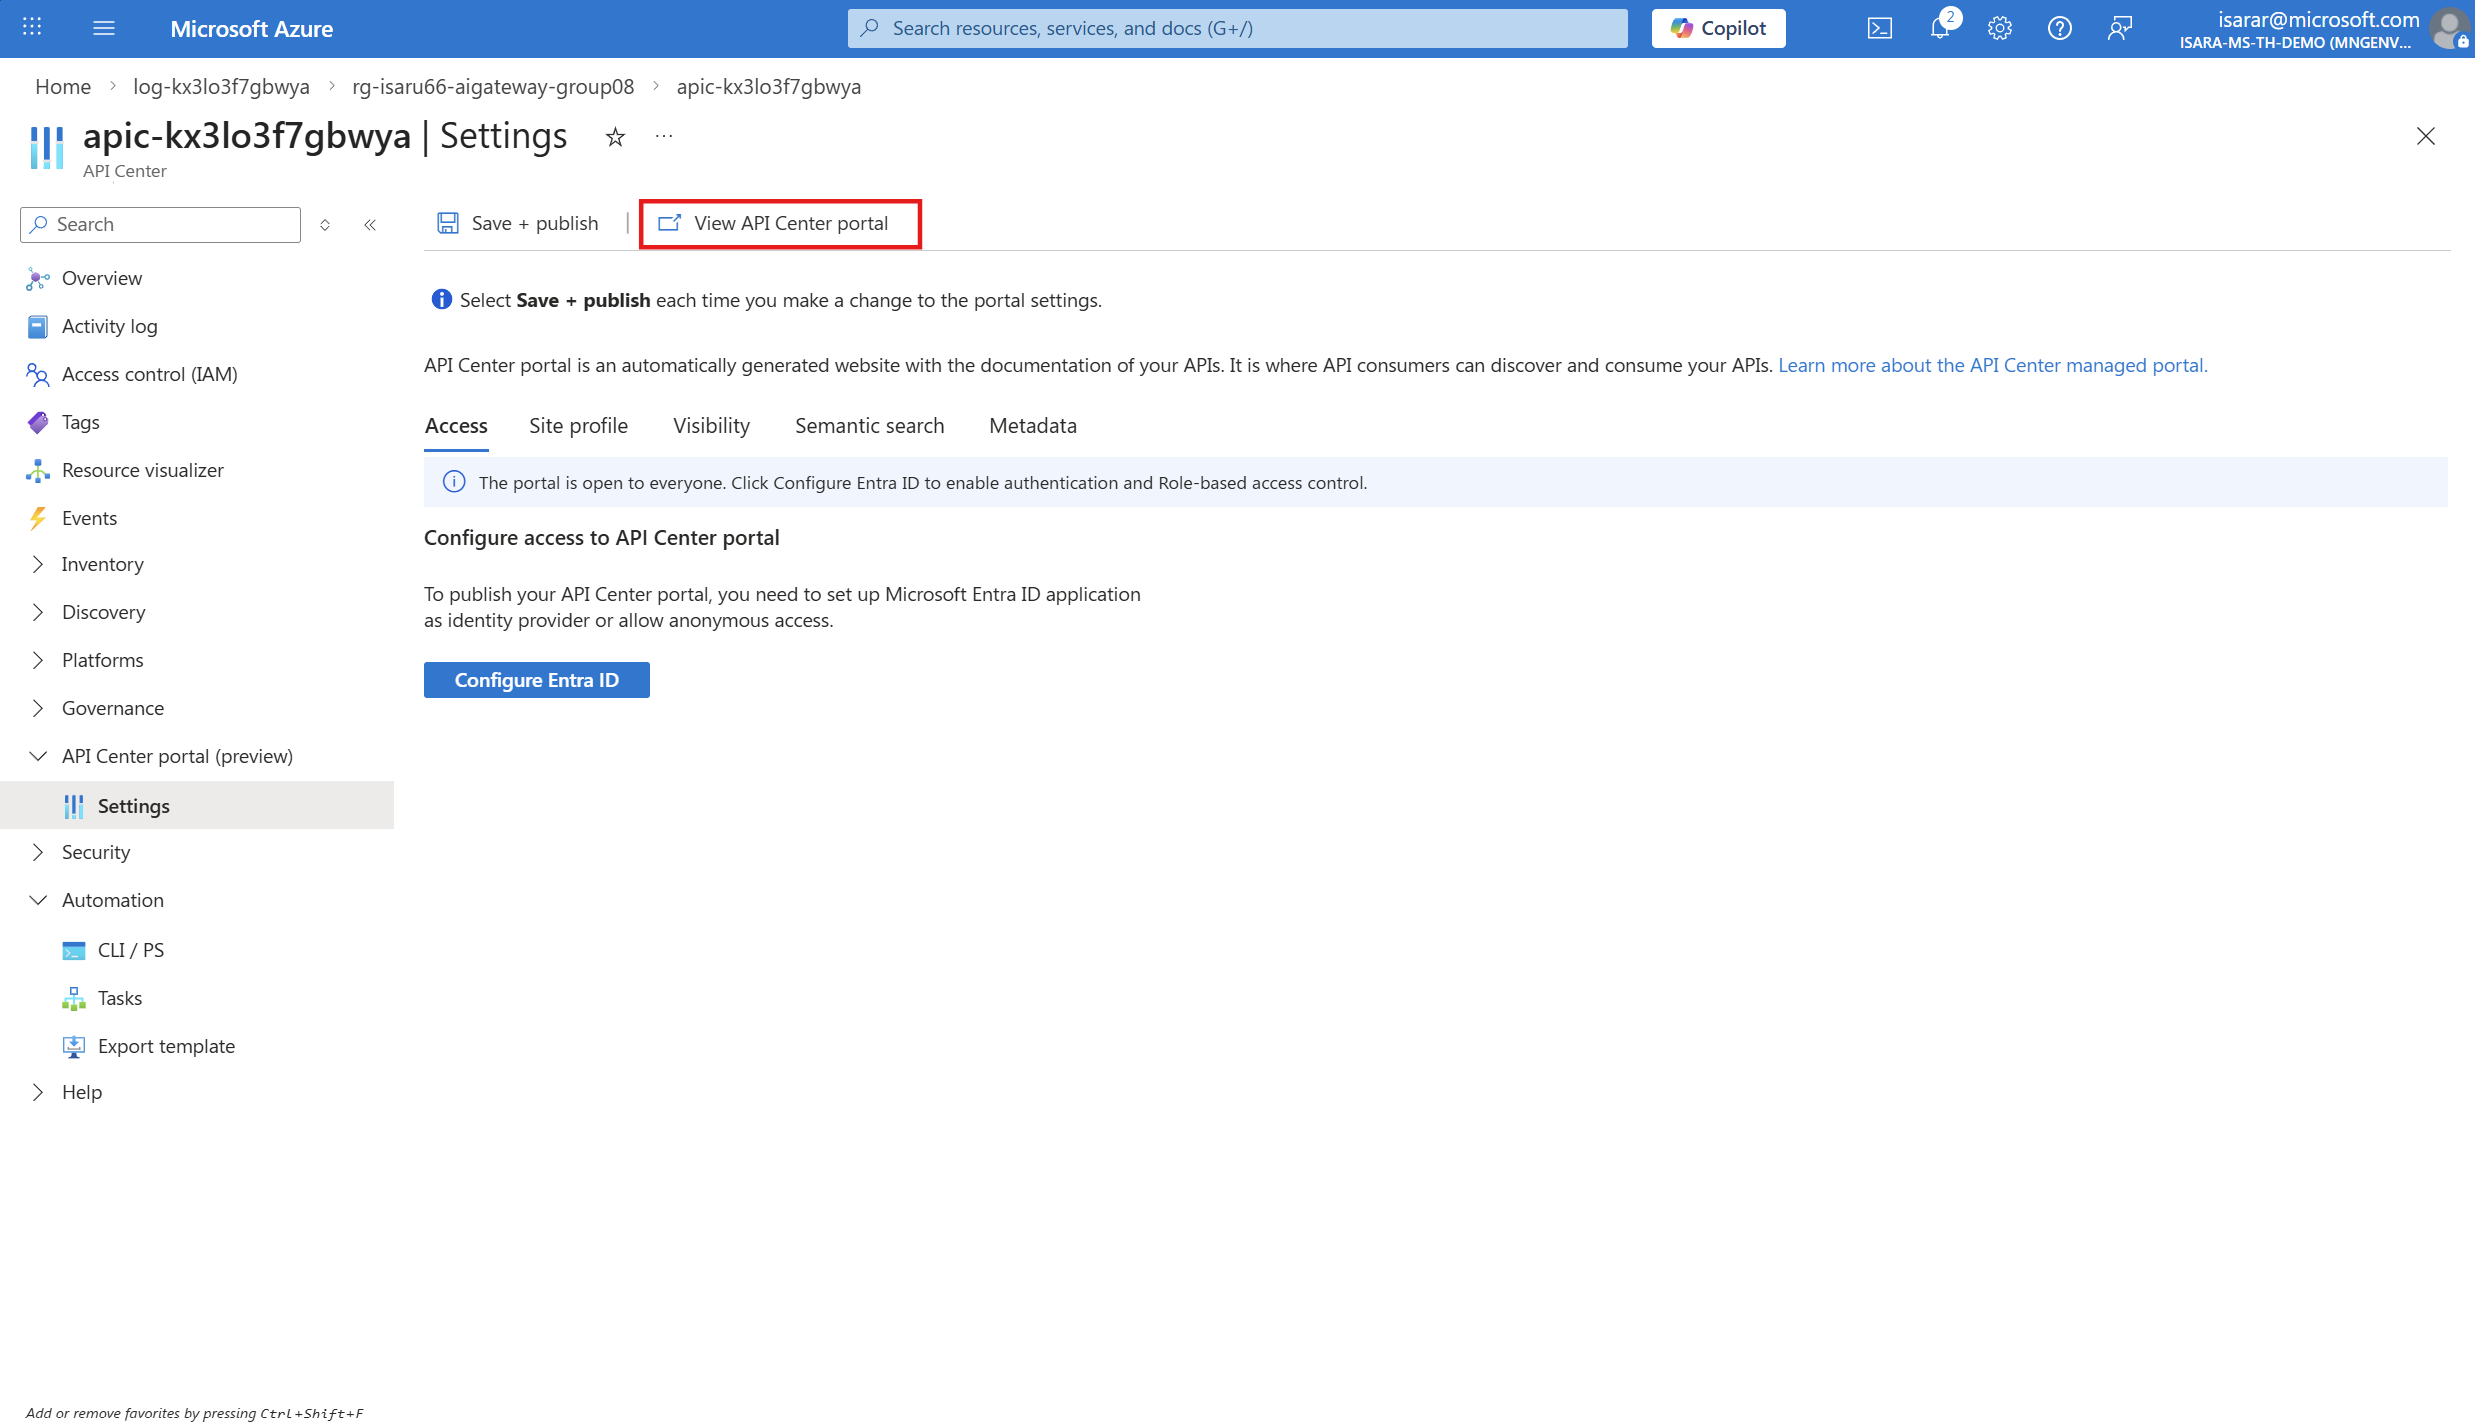
click View API Center Portal tab
04: Access and verify the API Center portal
After publishing the portal, verify that you can access it and discover the registered MCP servers.
Expand this section to view the solution
Access the portal
-
On the portal’s Settings page in the Azure portal, select View API Center portal to open it in a new tab.
Or, navigate directly using the URL format:
https://<api-center-name>.portal.<location>.azure-apicenter.msReplace
<api-center-name>and<location>with your API Center name and deployment location.
By default, the portal home page is publicly accessible , for authorization we can configure to requires sign-in to access API details in production use.
Verify MCP server discovery
-
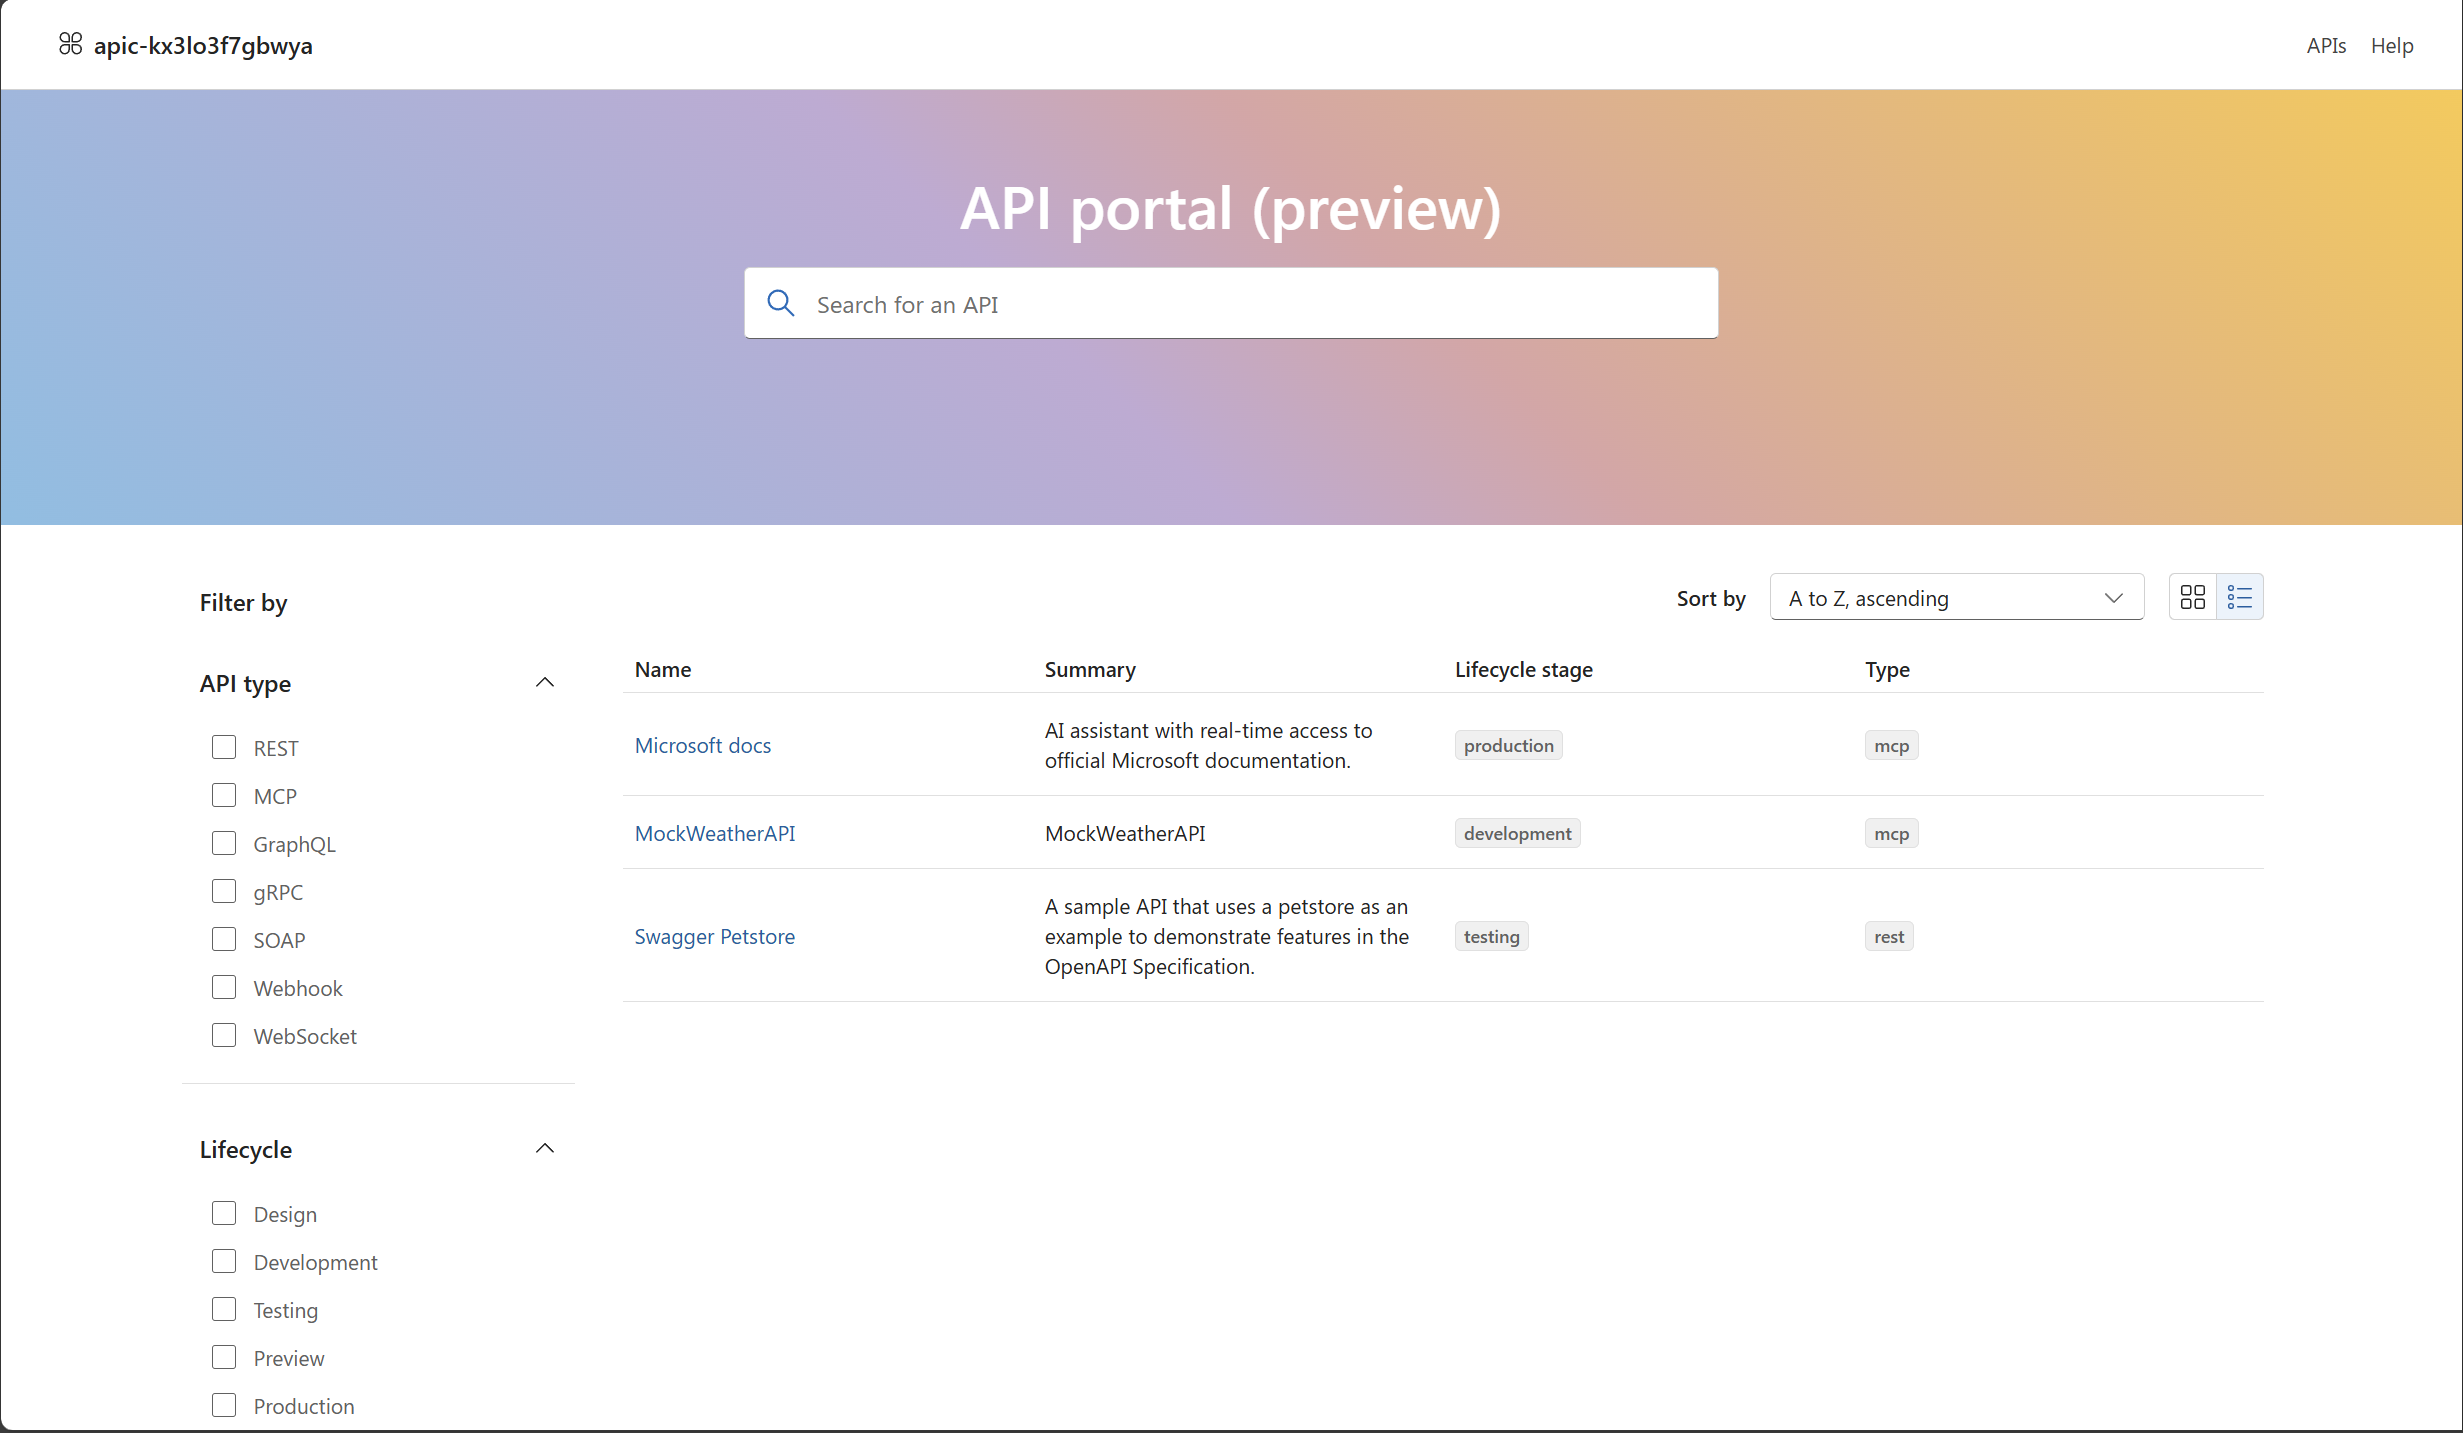
In the API Center portal, use the search bar to find your registered MCP servers.
- Filter APIs by type:
- Select Type filter
- Choose MCP to show only MCP servers
- Select an MCP server to view its details:
- API description and metadata
- Deployment endpoint URL (if configured)
- OpenAPI definition (if available)
- Documentation and lifecycle stage
- Verify that users can:
- Browse and discover MCP servers
- View server details and endpoints
- Download API definitions
Summary
In this exercise, you learned how to:
- Register partner MCP servers from the curated list in Azure API Center
- Manually register custom MCP servers with environments, deployments, and API definitions
- Configure and publish the API Center portal for discovery
- Enable anonymous or authenticated access to the portal
- Assign user permissions for accessing APIs in the portal
By registering your MCP servers in Azure API Center and publishing the portal, you provide a centralized discovery experience that helps developers and stakeholders find, understand, and consume MCP servers across your organization.
- Ensure fairness: Distribute token quotas fairly across teams or applications