Task 05 - Test MCP server with GitHub Copilot
Introduction
Now that your MCP server is running (either locally or deployed to Azure Container Apps), you can connect it to GitHub Copilot in VS Code. This allows Copilot’s agent mode to use the MCP tools directly from the chat interface — meaning you can ask natural language questions and Copilot will automatically call the appropriate MCP tools to get the answers.
Description
In this task, you will configure VS Code to register your MCP server as a tool source for GitHub Copilot. You will then use Copilot Chat in agent mode to interact with the get_cities and get_weather tools using natural language.
Success Criteria
- The MCP server is registered in VS Code settings.
- GitHub Copilot can discover and list the MCP tools.
- You can ask Copilot natural language questions and it calls the MCP tools automatically.
Learning Resources
Key Tasks
01: Register the MCP server in VS Code
Add the MCP server configuration to your VS Code settings so GitHub Copilot can discover it.
Expand this section to view the solution
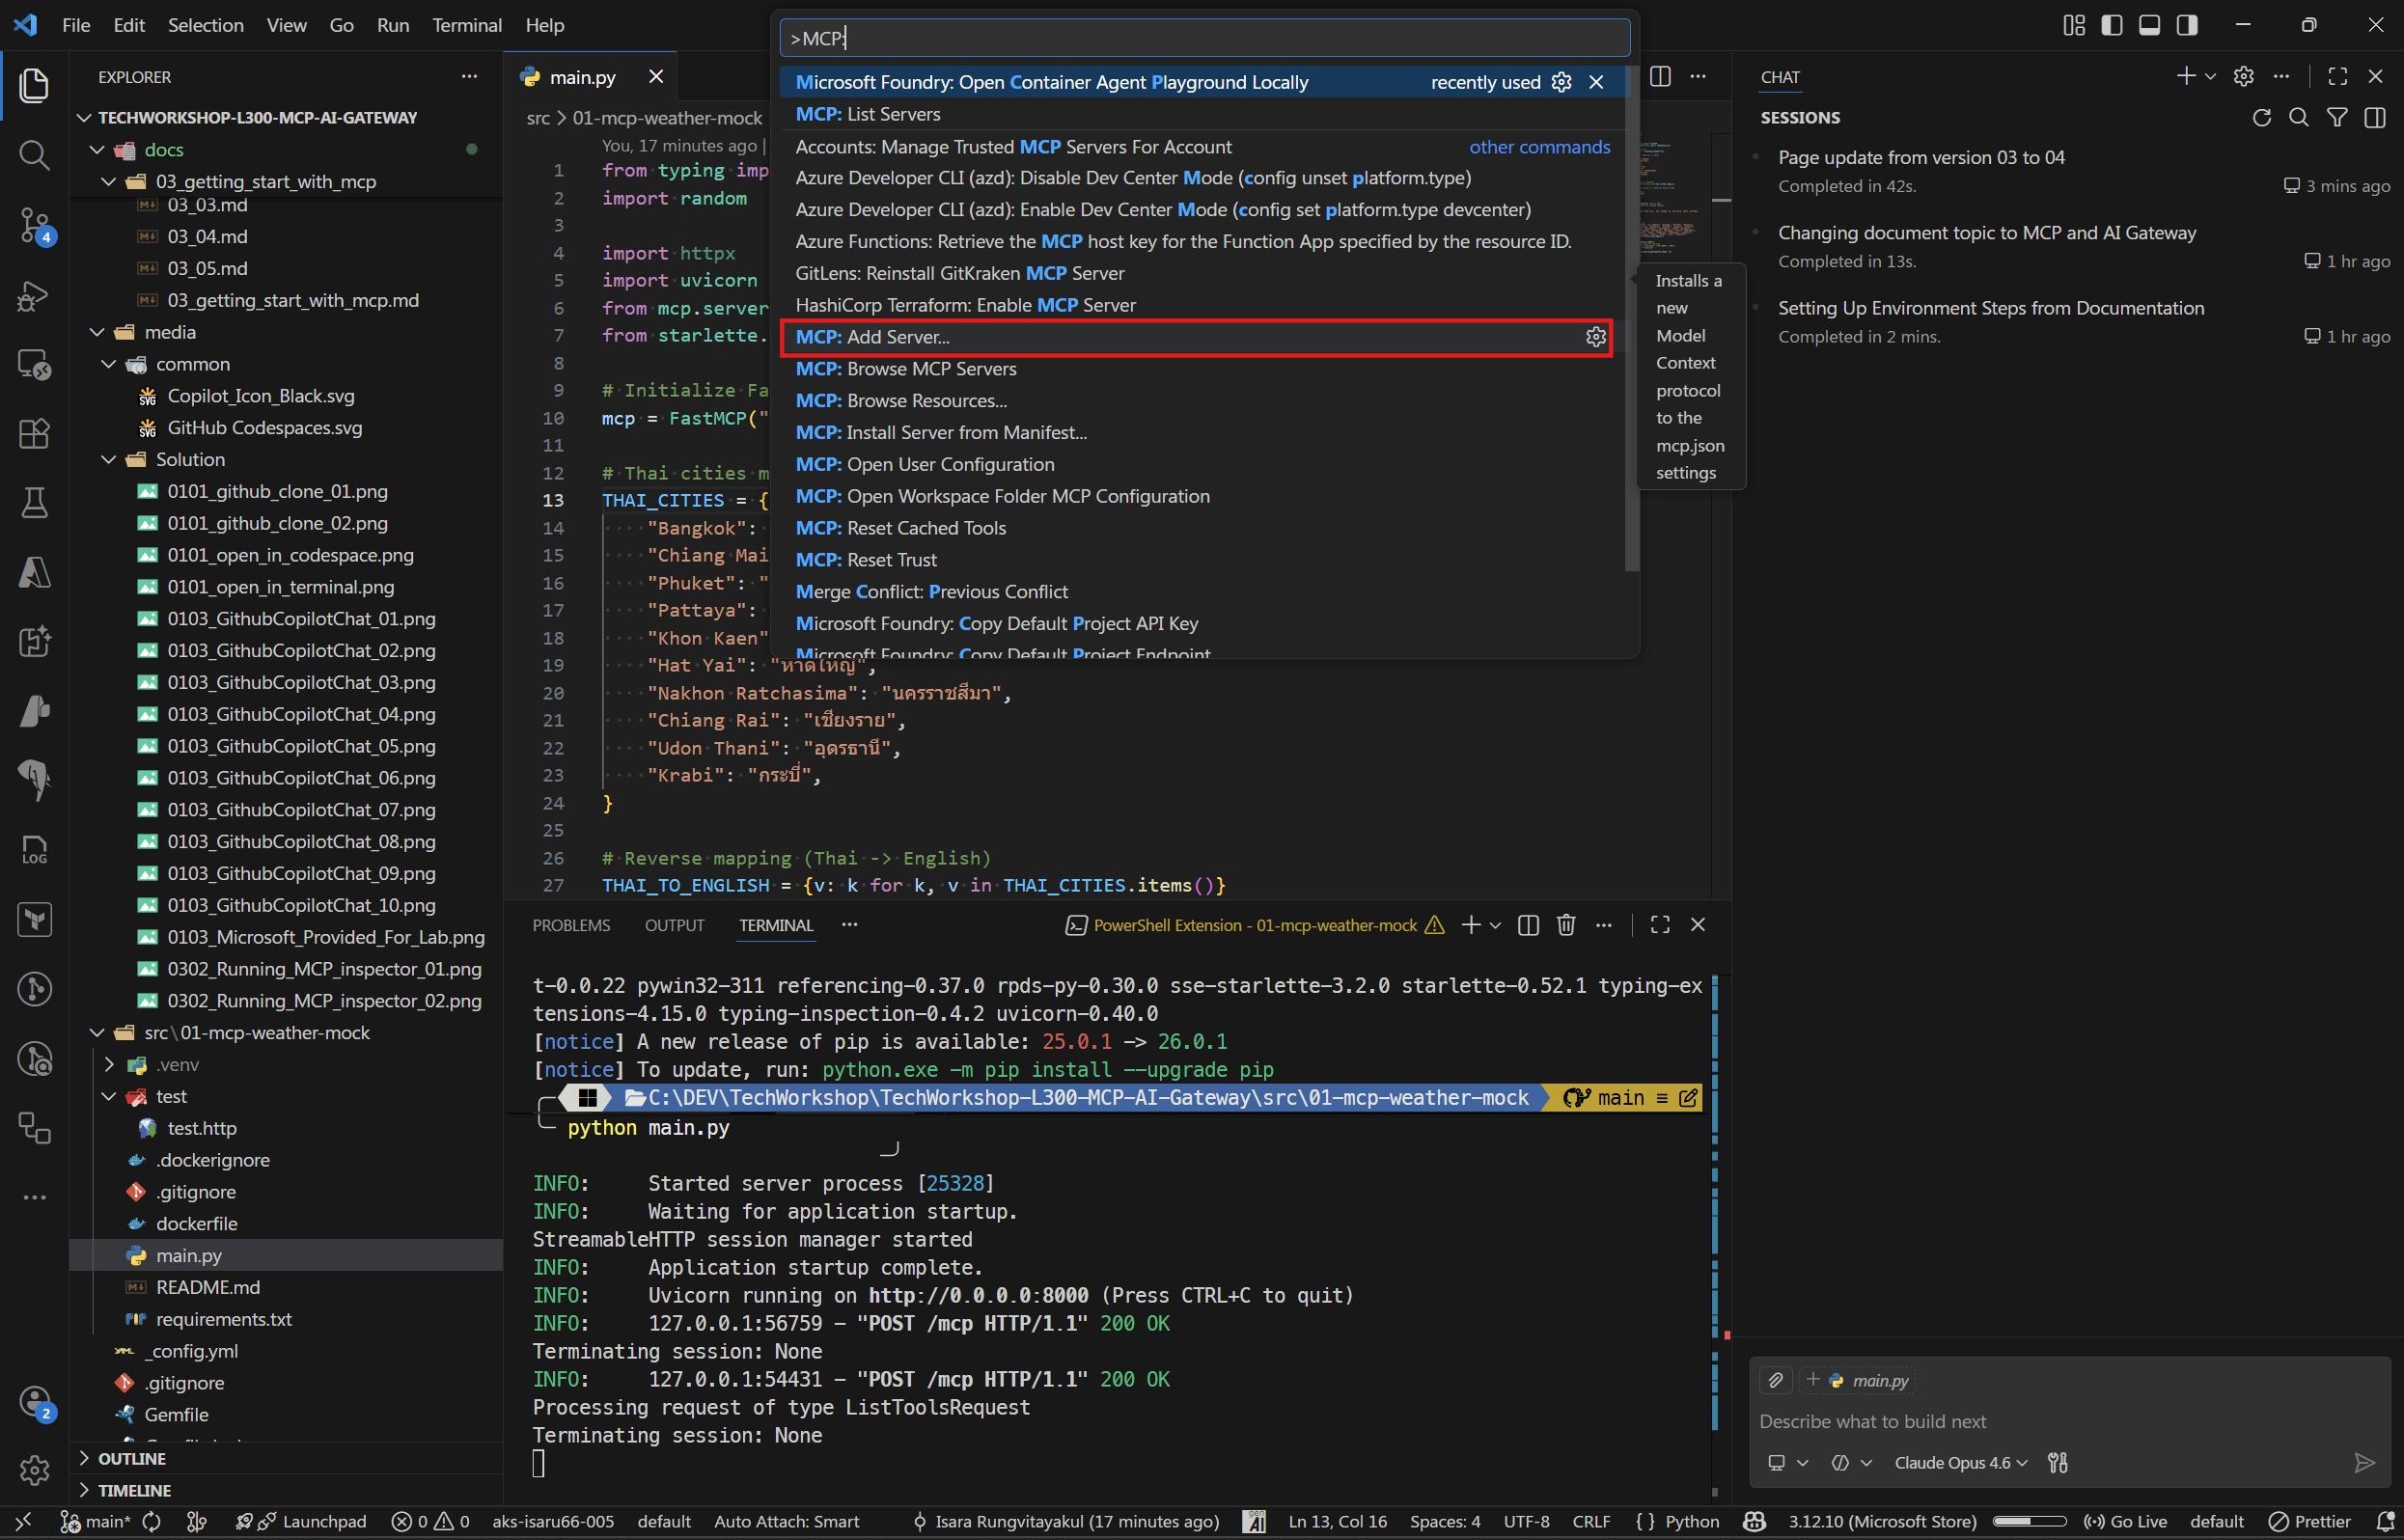
- Open the Command Palette in VS Code (Ctrl+Shift+P or Cmd+Shift+P).
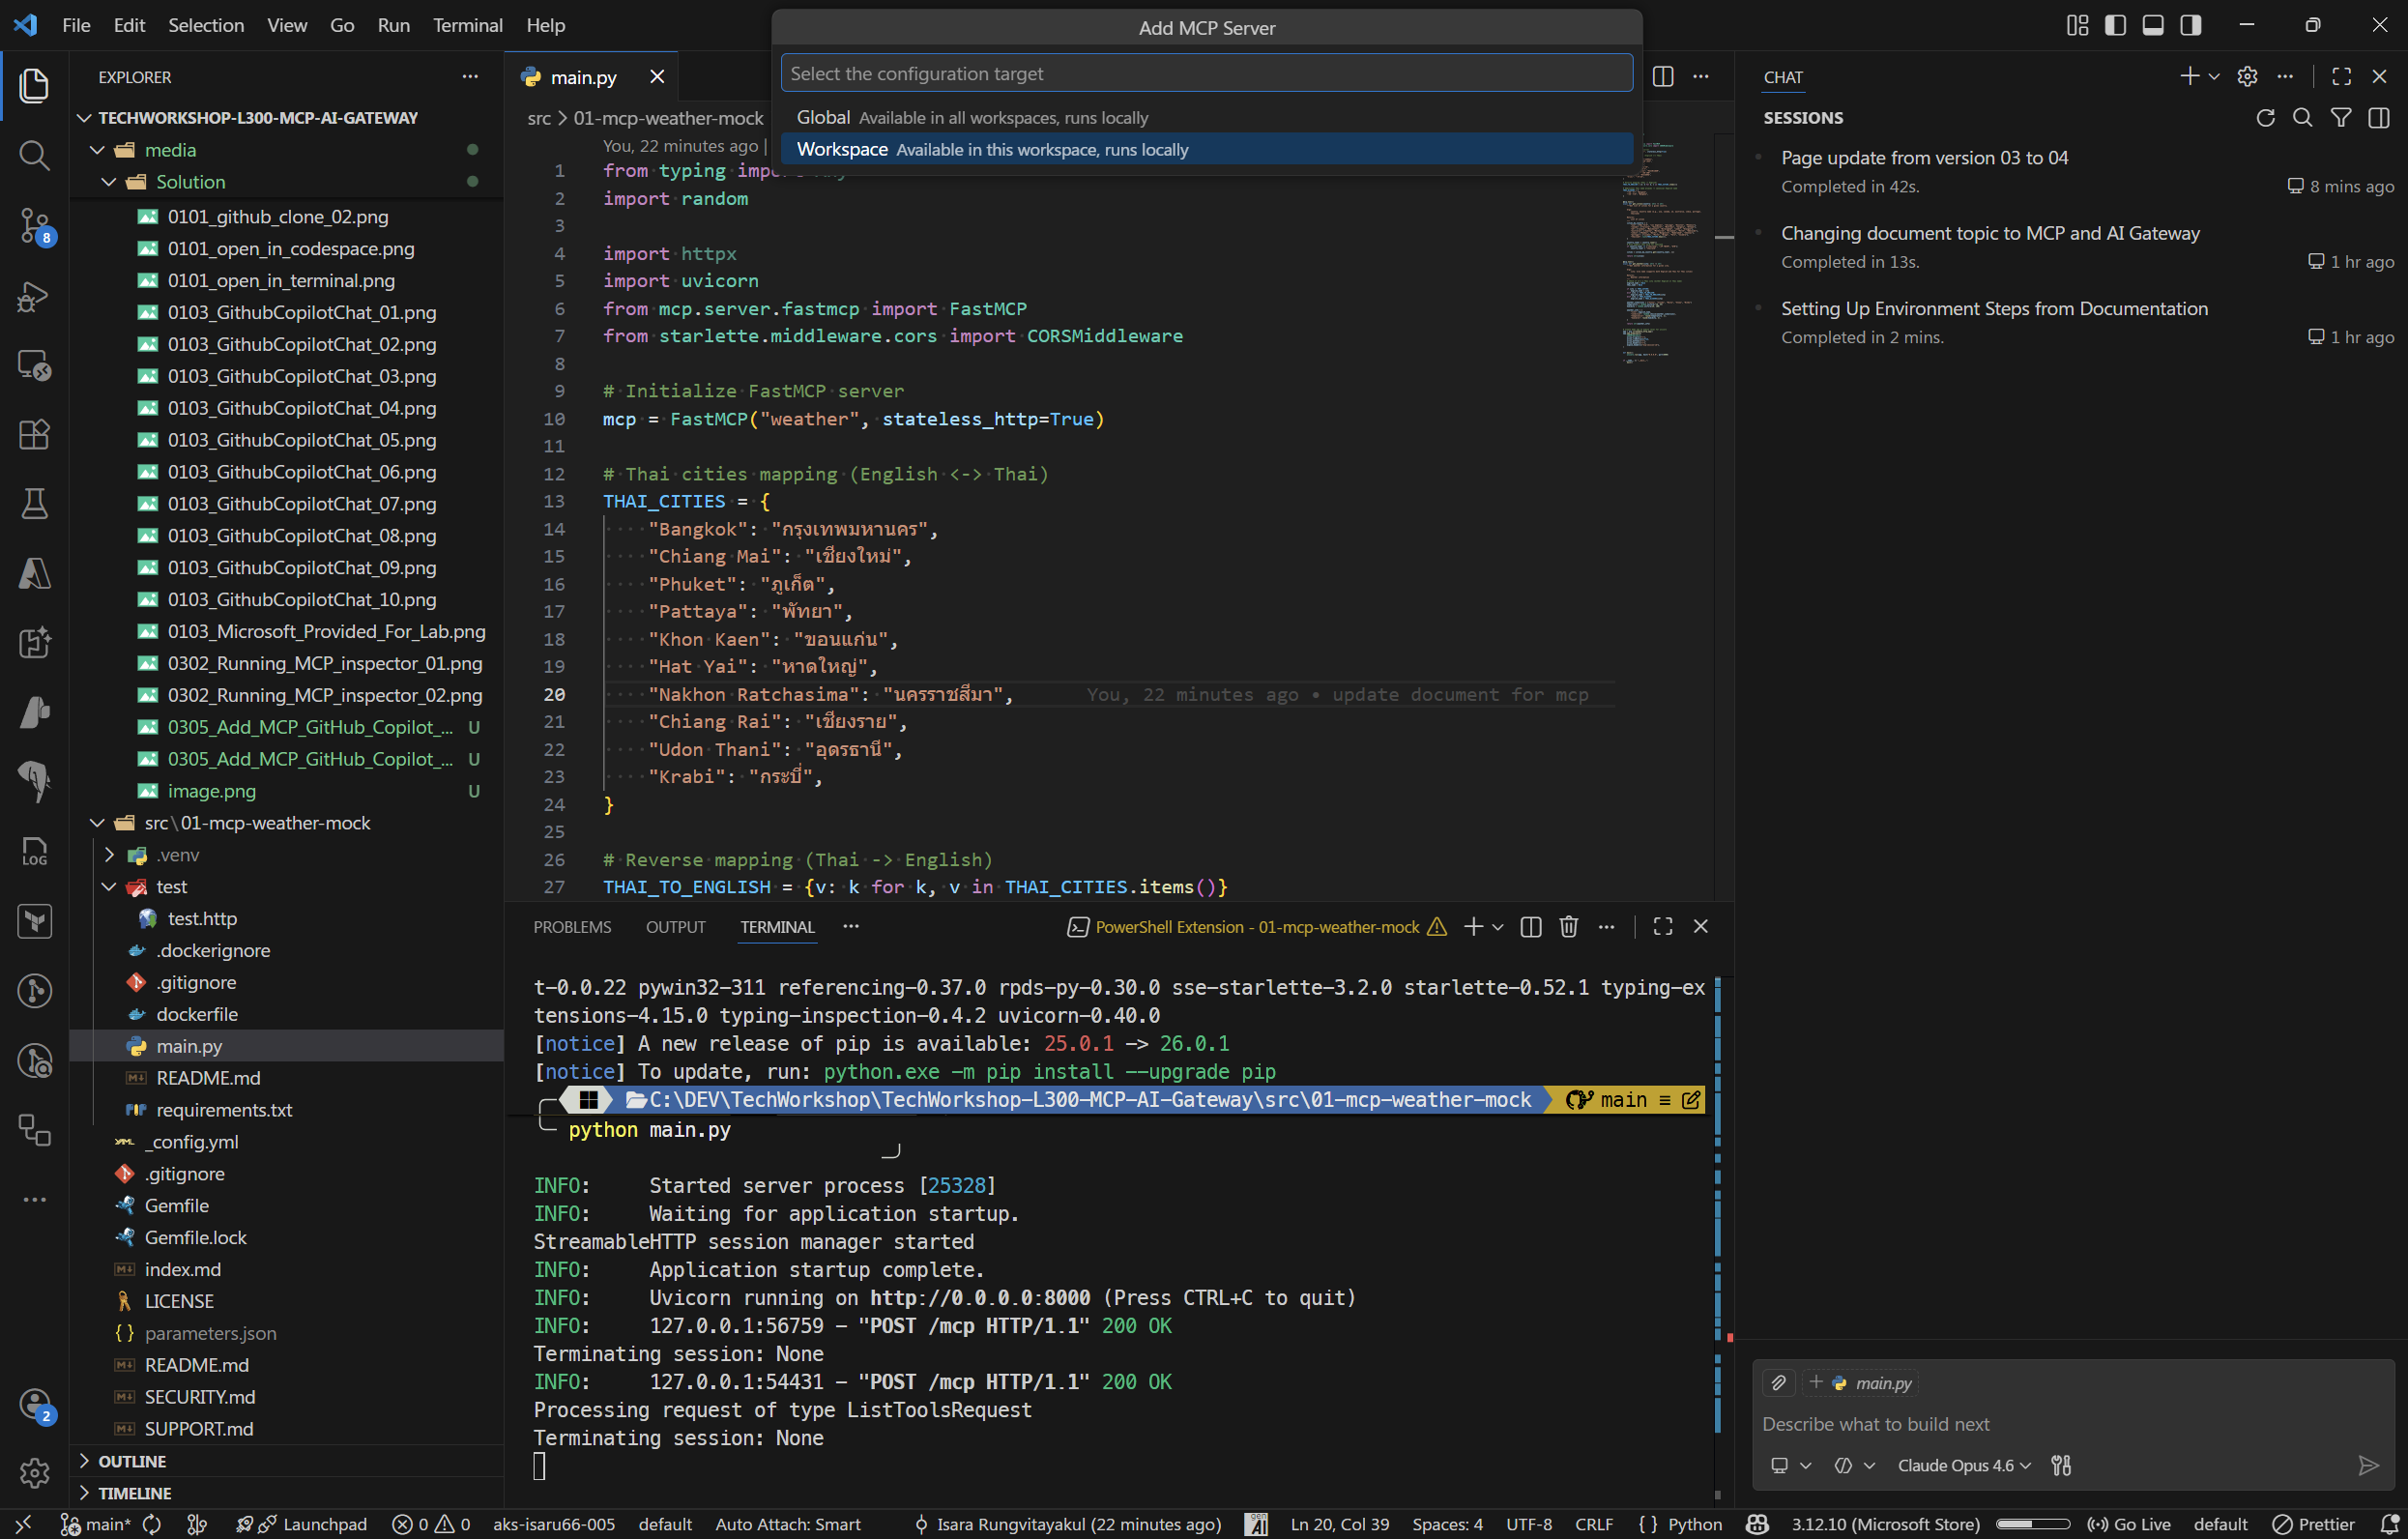
- Type MCP: Add Server and select it.
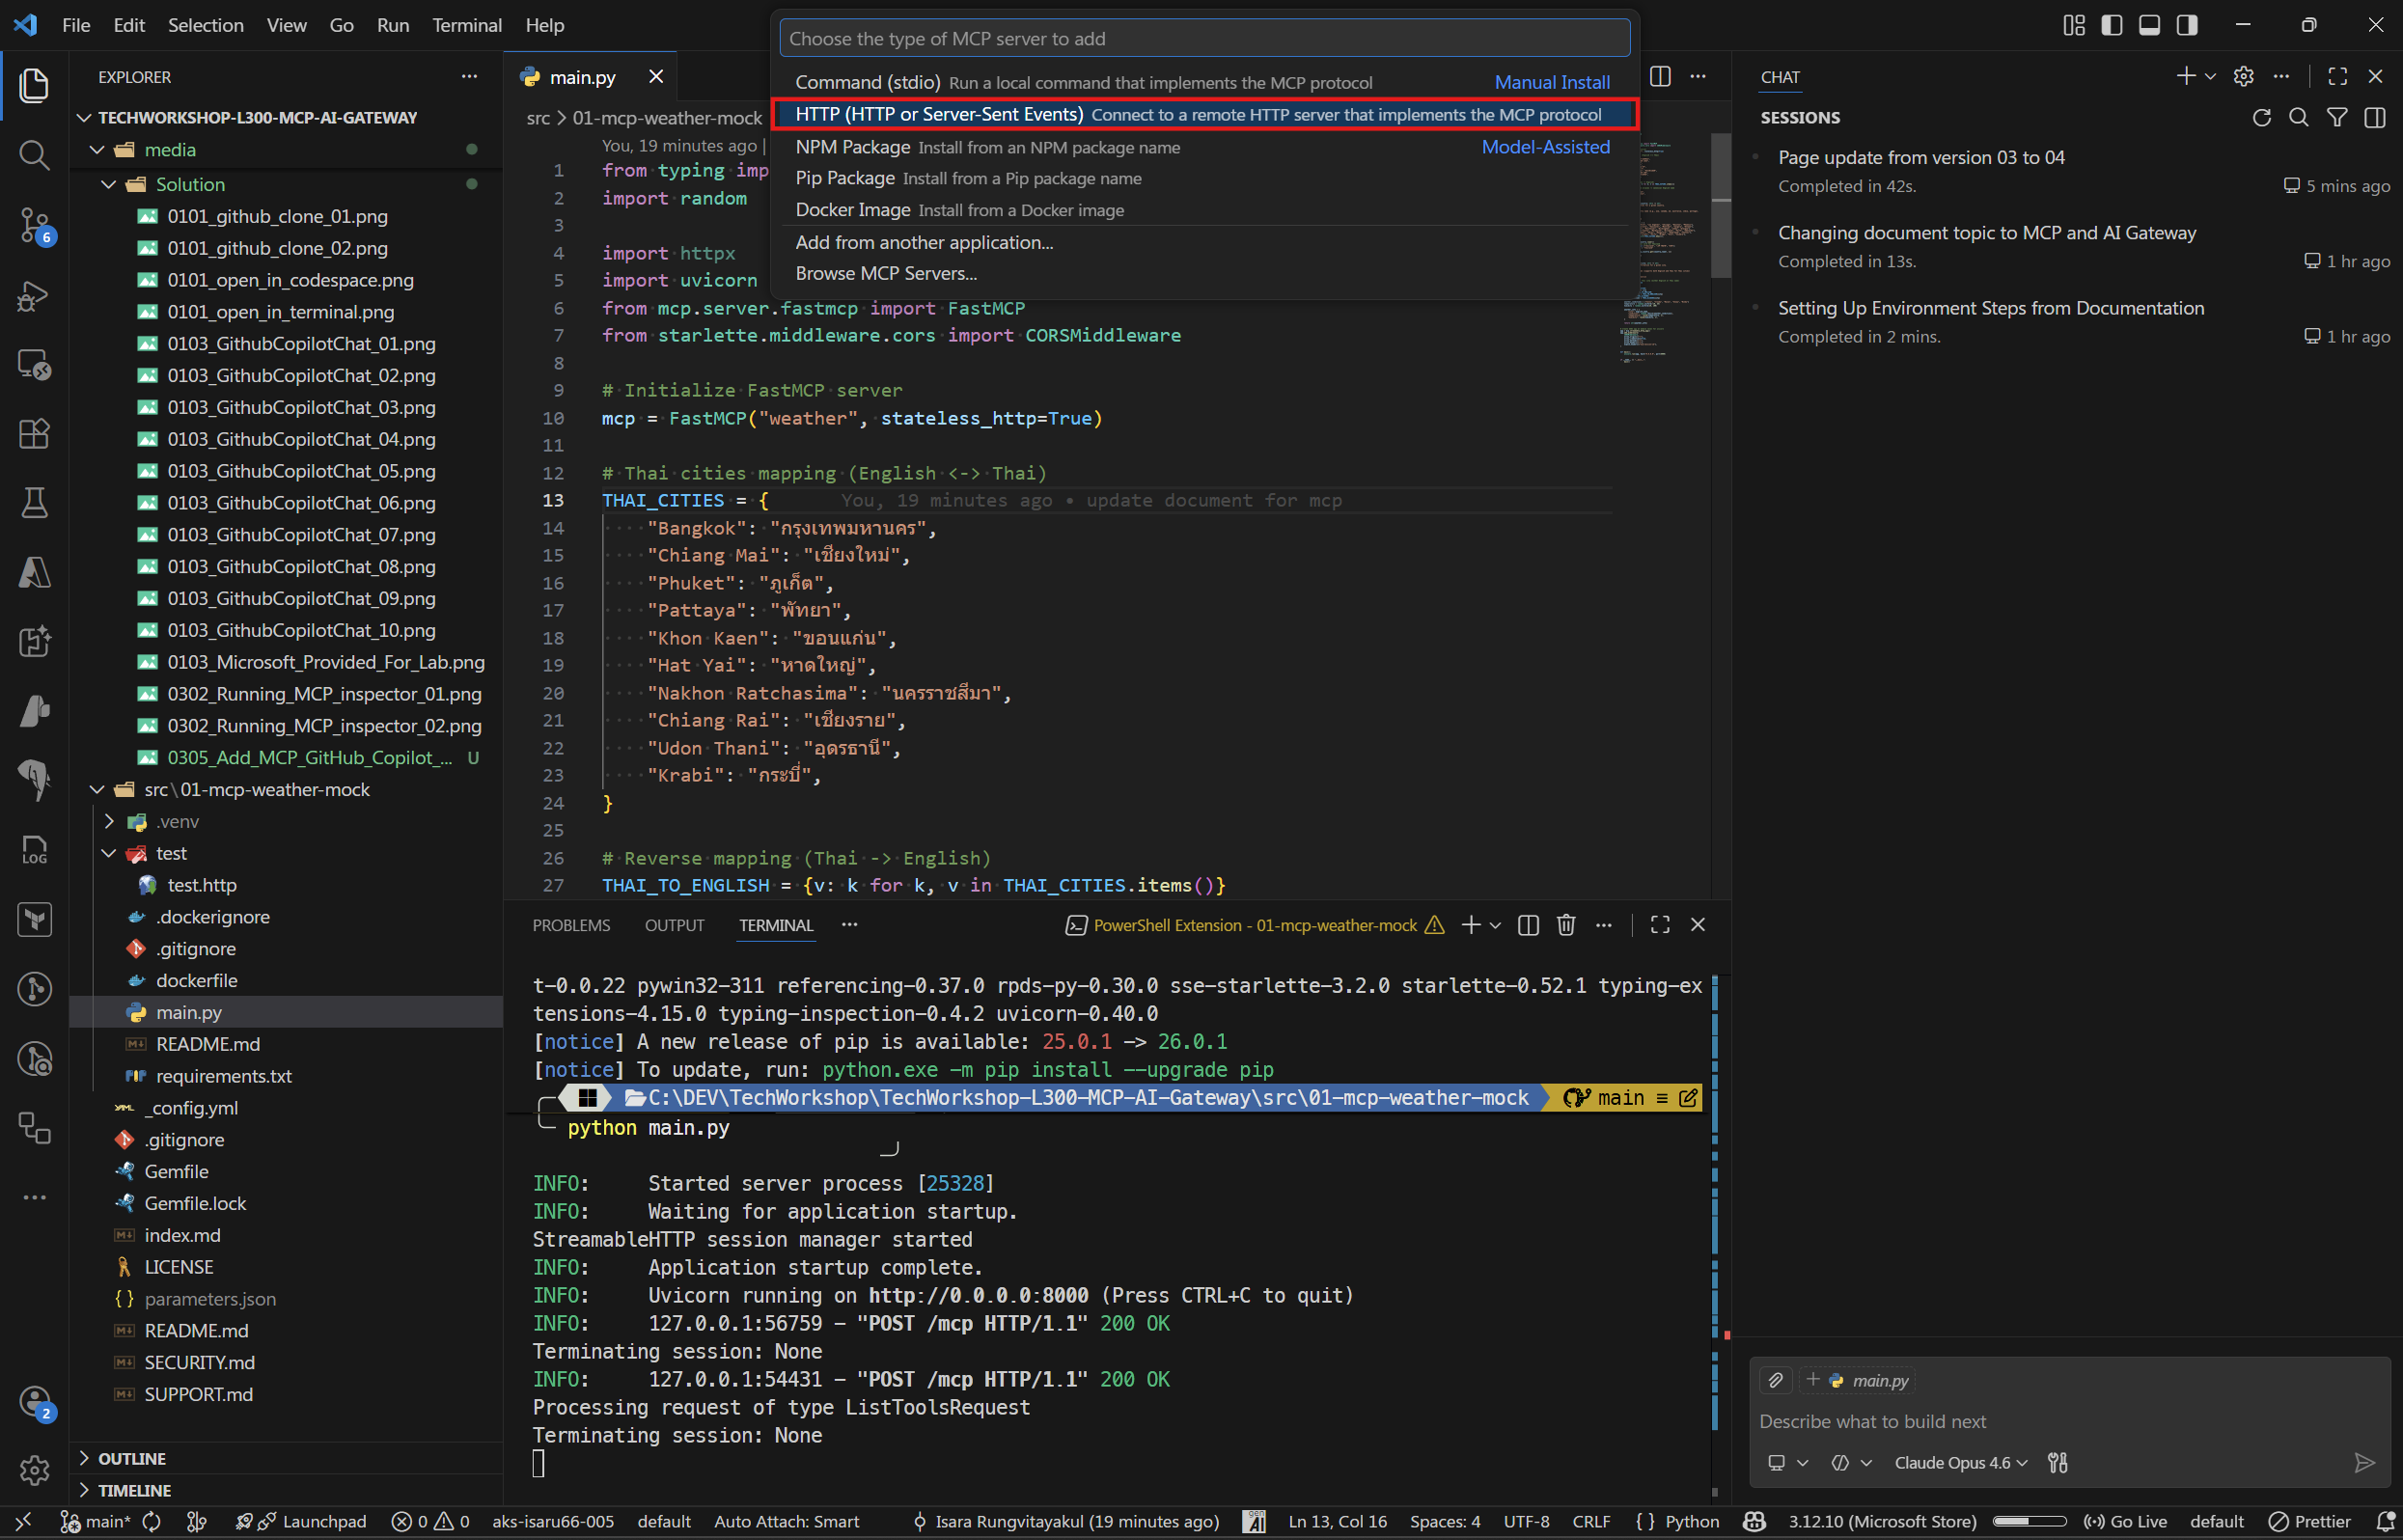
- Select HTTP (HTTP or Server Send Event) as the server type.
- Enter the MCP server URL:
- Local server:
http://localhost:8000/mcp - Azure Container Apps:
https://<your-container-app-url>/mcp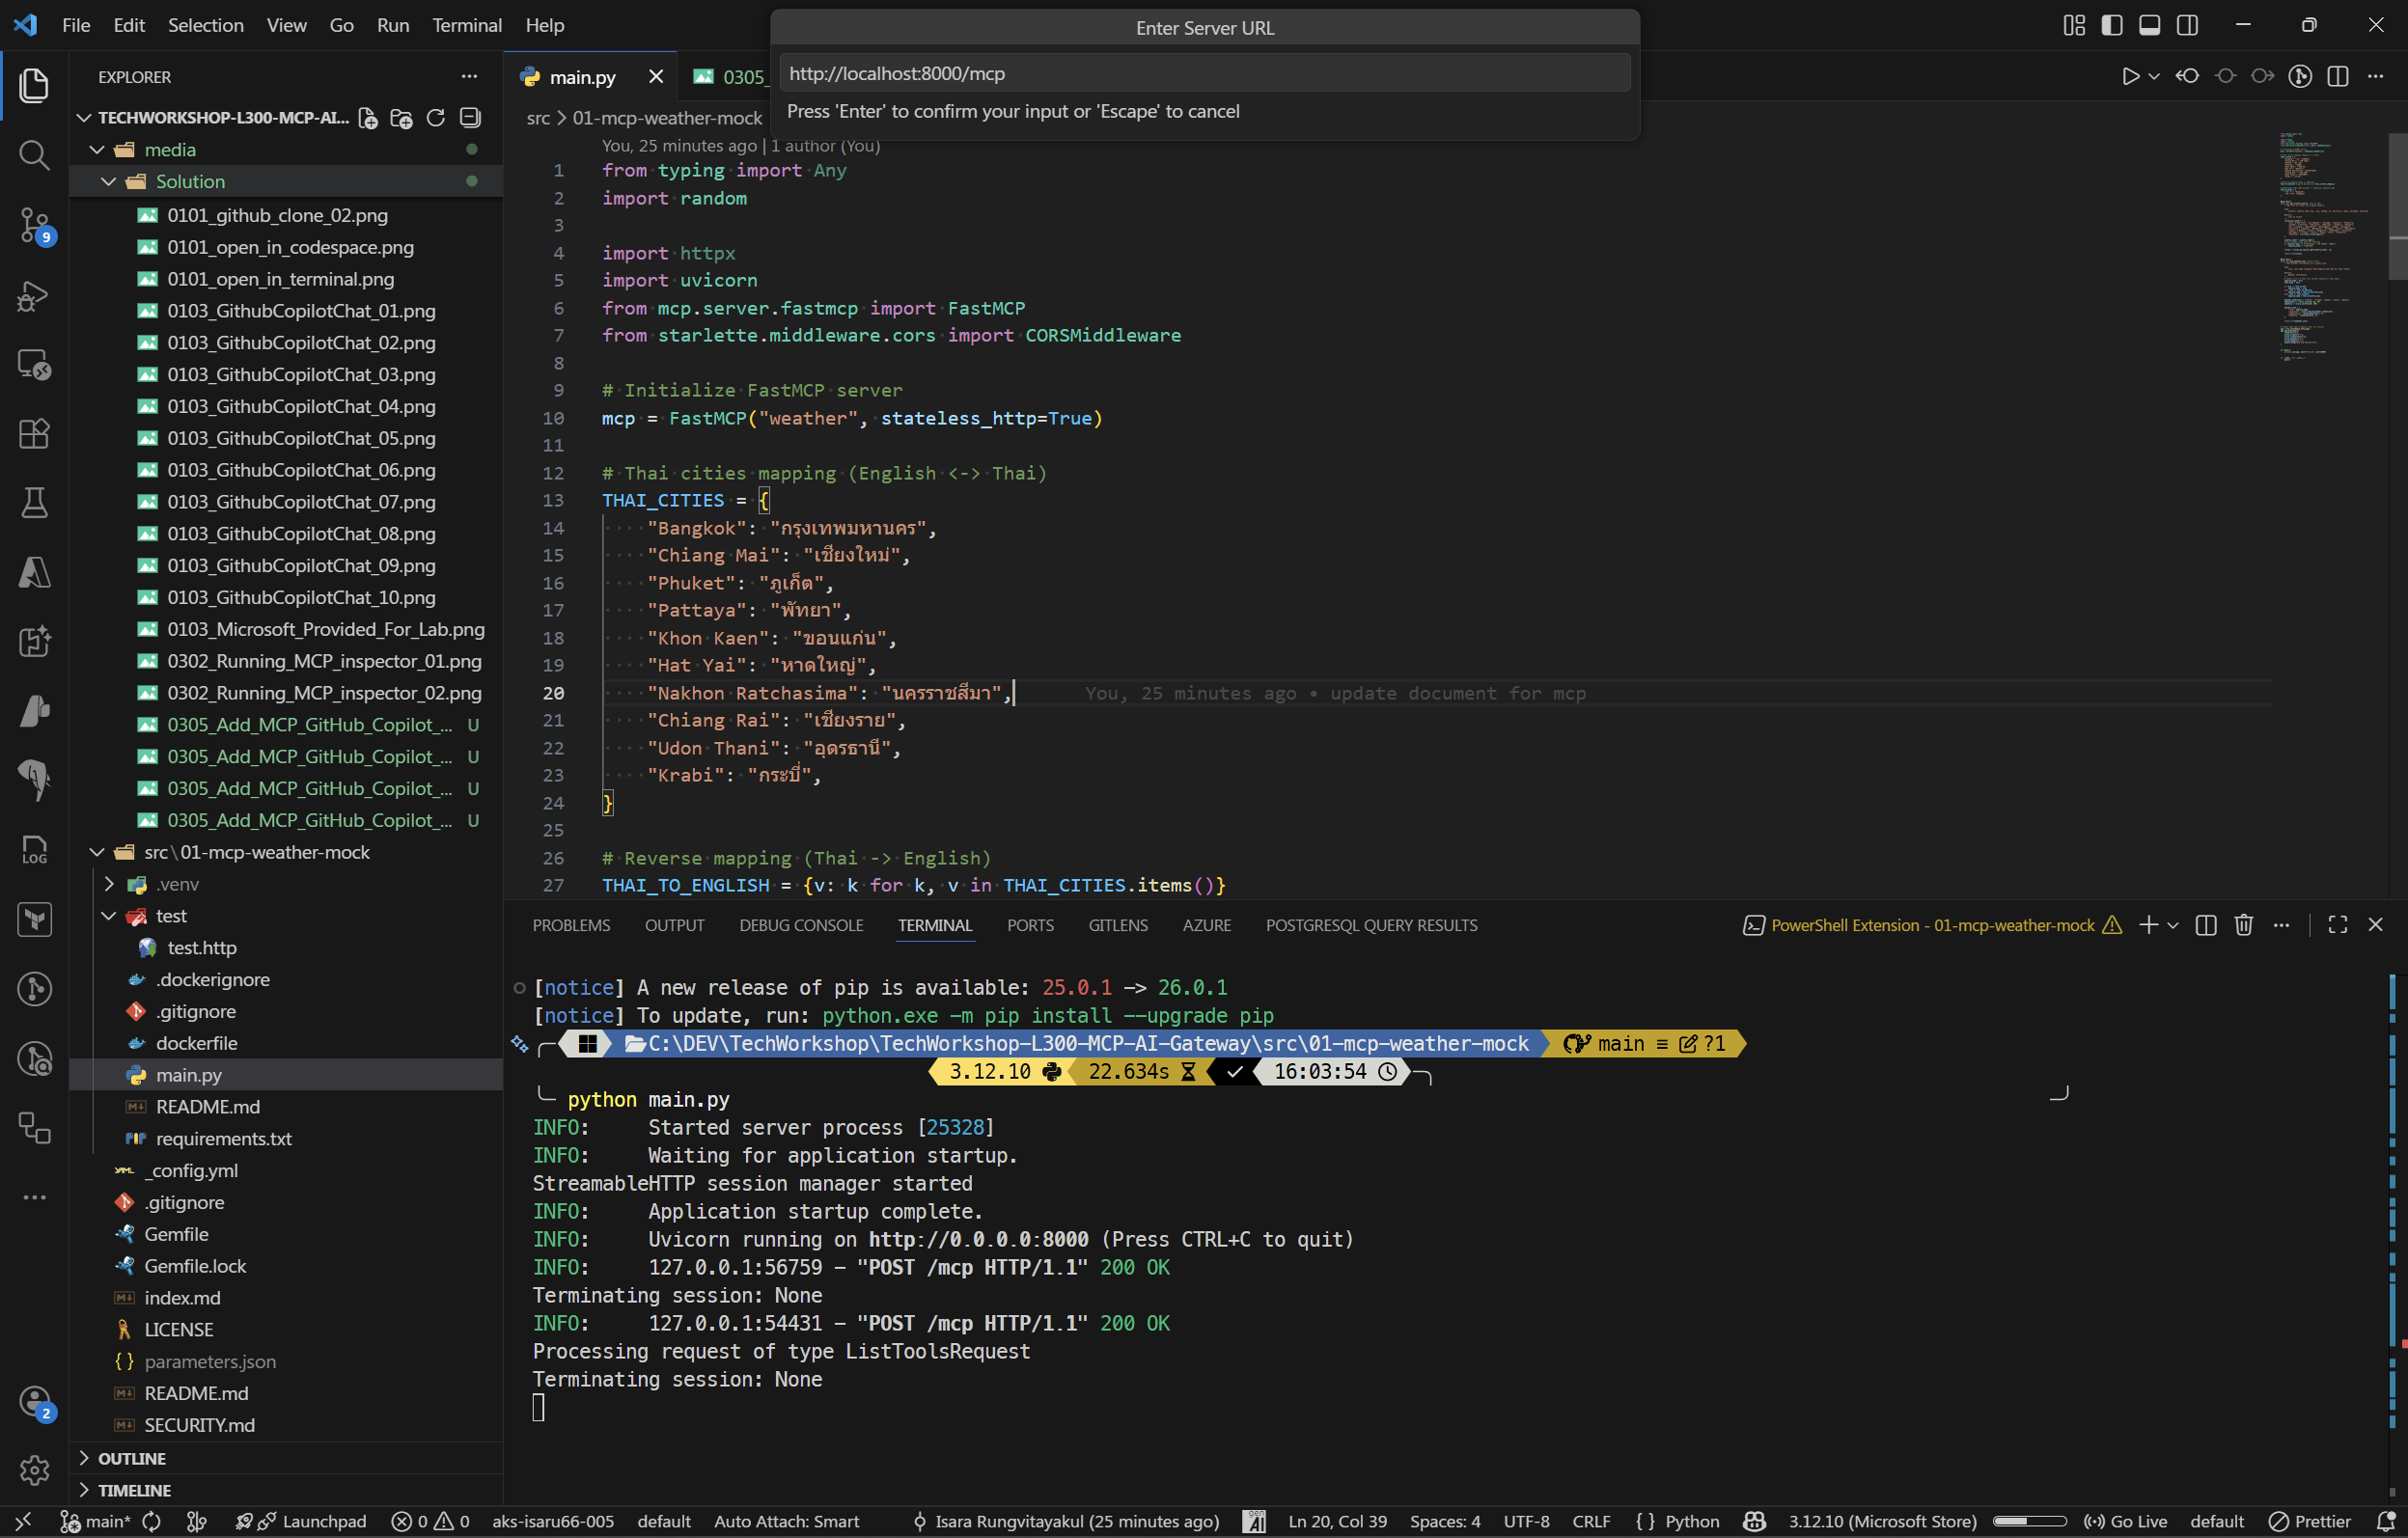
- Local server:
- Enter a name for the server, e.g.,
my-weather-mock.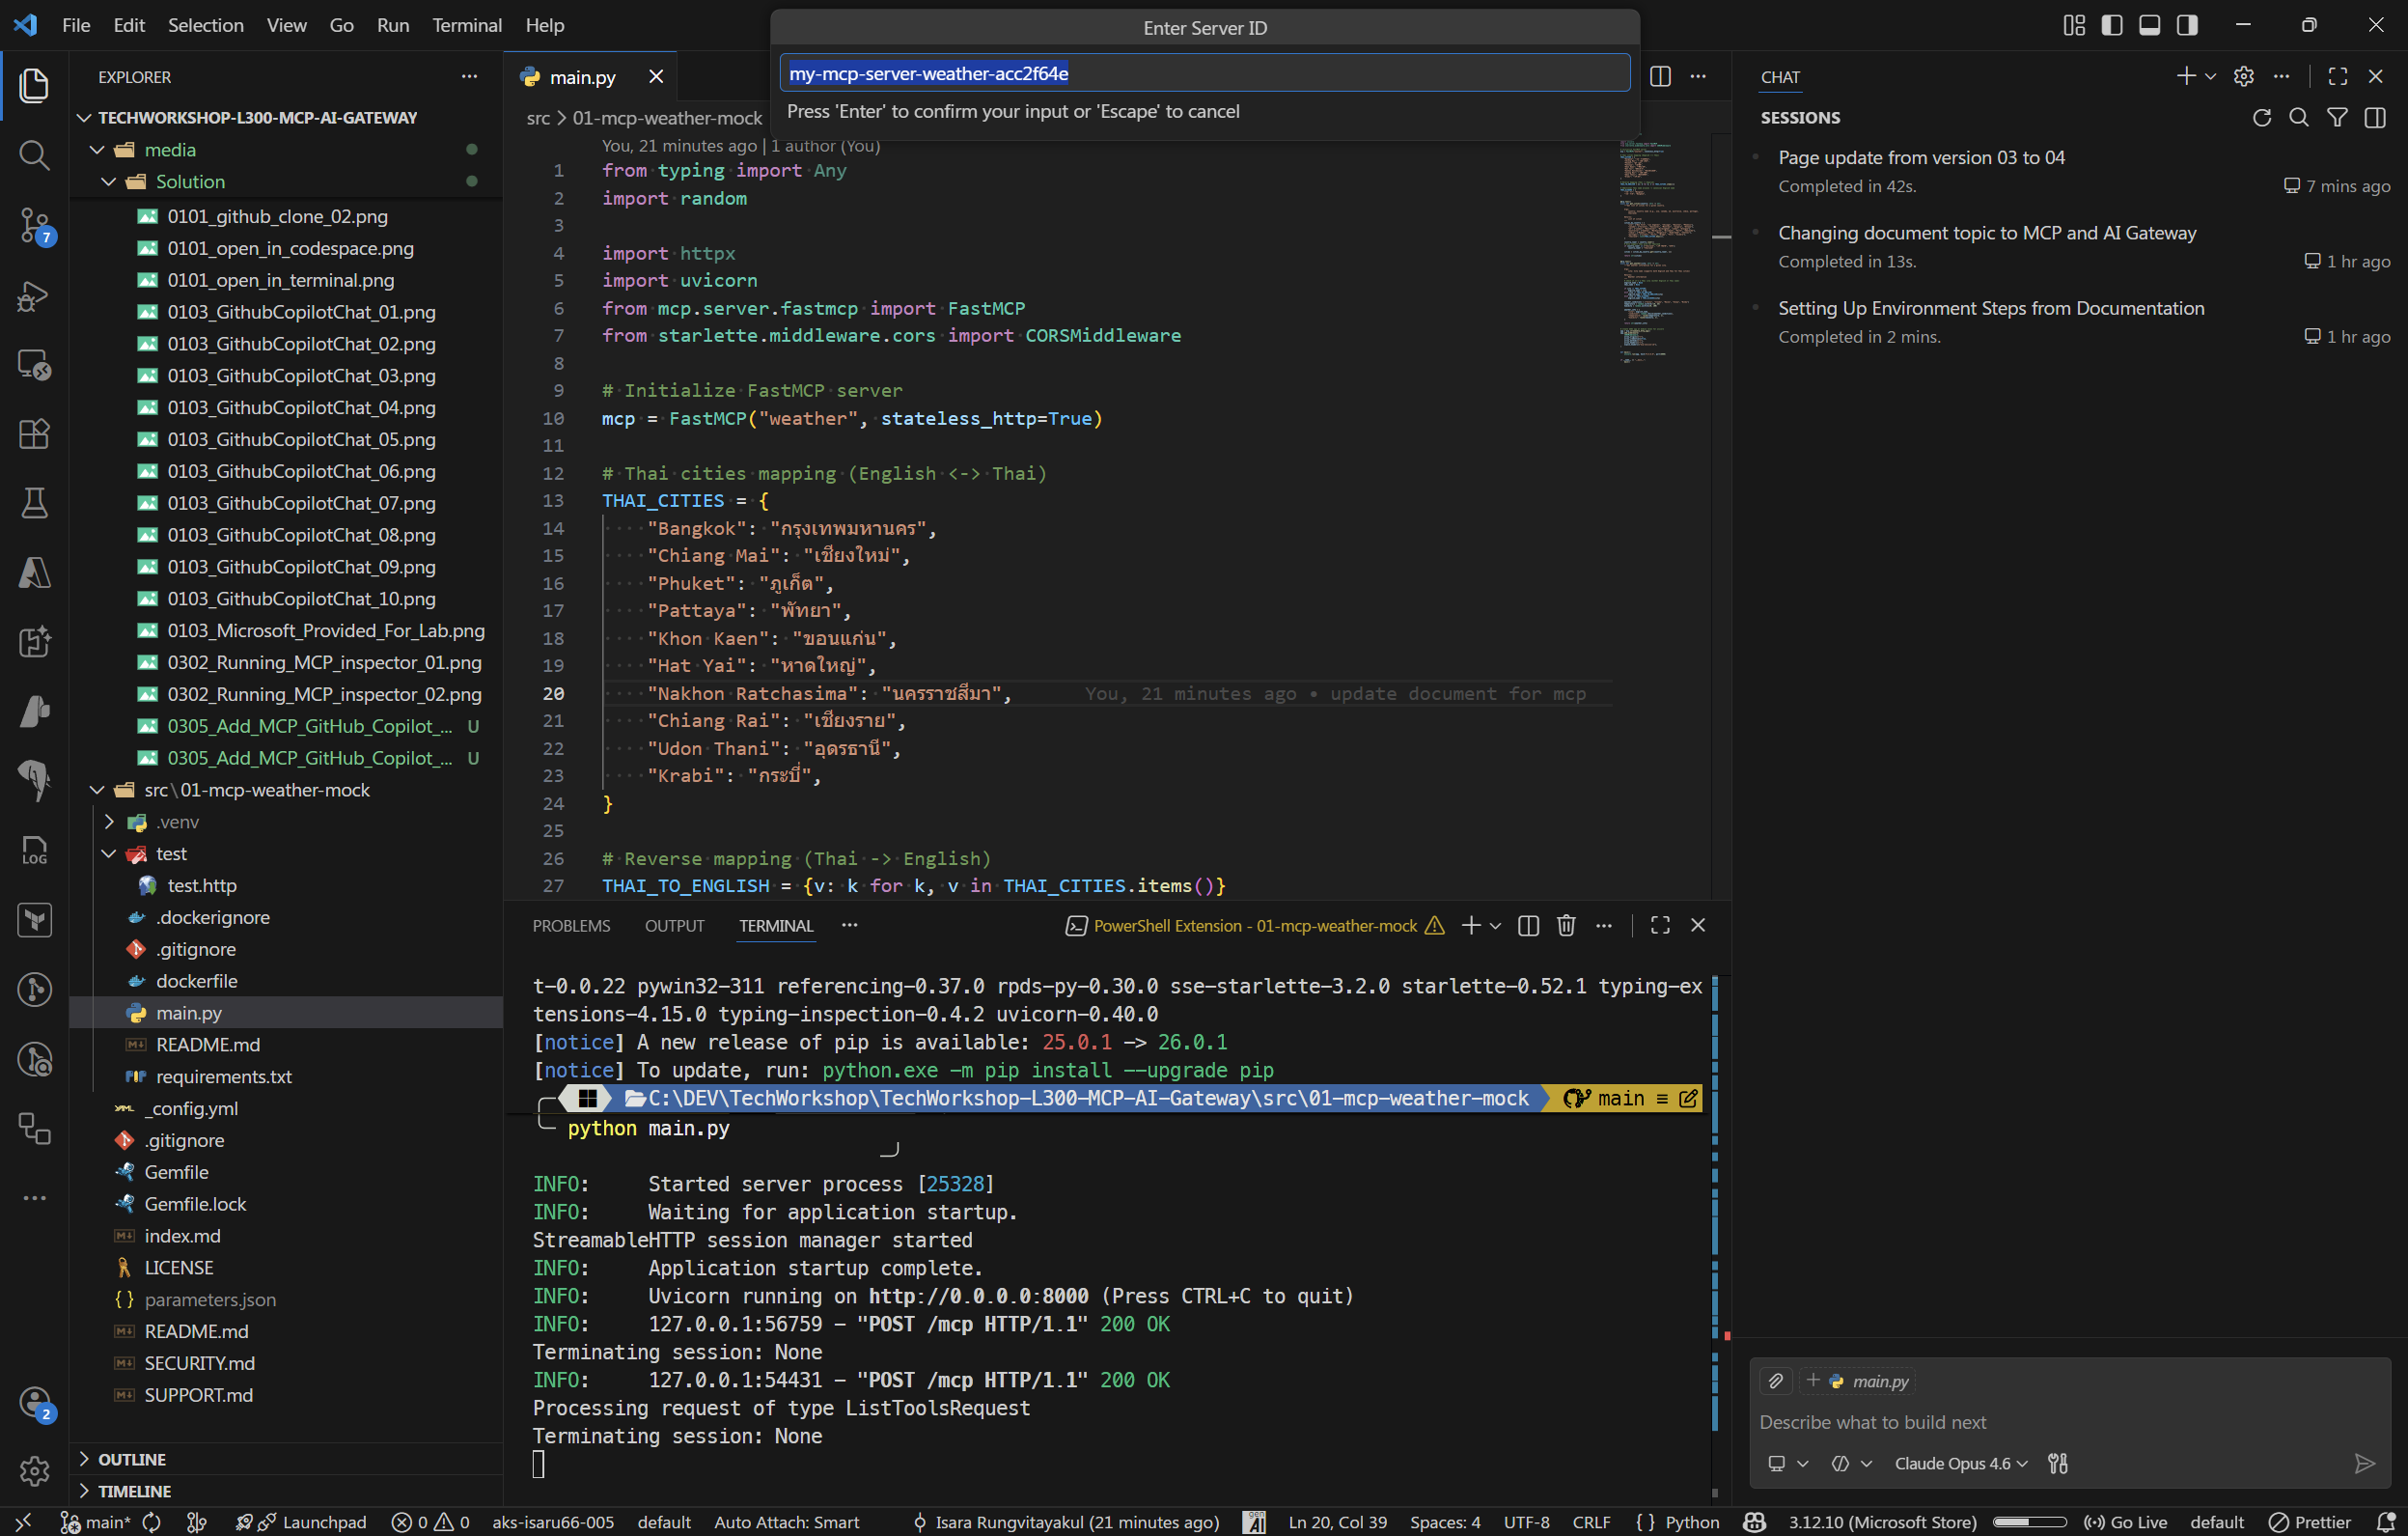
- Select Workspace Settings to save the configuration to the current workspace.
 This creates (or updates) a
 .vscode/mcp.jsonfile in your workspace with the following content:
{
  "servers": {
    "weather-mock": {
      "type": "http",
      "url": "http://localhost:8000/mcp"
    }
  }
}
You can also manually create or edit the
.vscode/mcp.jsonfile directly if you prefer.
02: Verify the MCP server connection
Confirm that VS Code has successfully connected to the MCP server and can discover the tools.
Expand this section to view the solution
- After adding the server, VS Code will attempt to connect automatically.
- Open the Command Palette (Ctrl+Shift+P) and type MCP: List Servers to see the registered servers.
- The
my-weather-mockserver should show a Running status. - If the server shows as disconnected, ensure the MCP server is running and click Restart from the server list.
You can also check the connection by opening Copilot Chat and looking for the tools icon (wrench/hammer icon) — clicking it should show the MCP tools (get_cities, get_weather) in the available tools list. 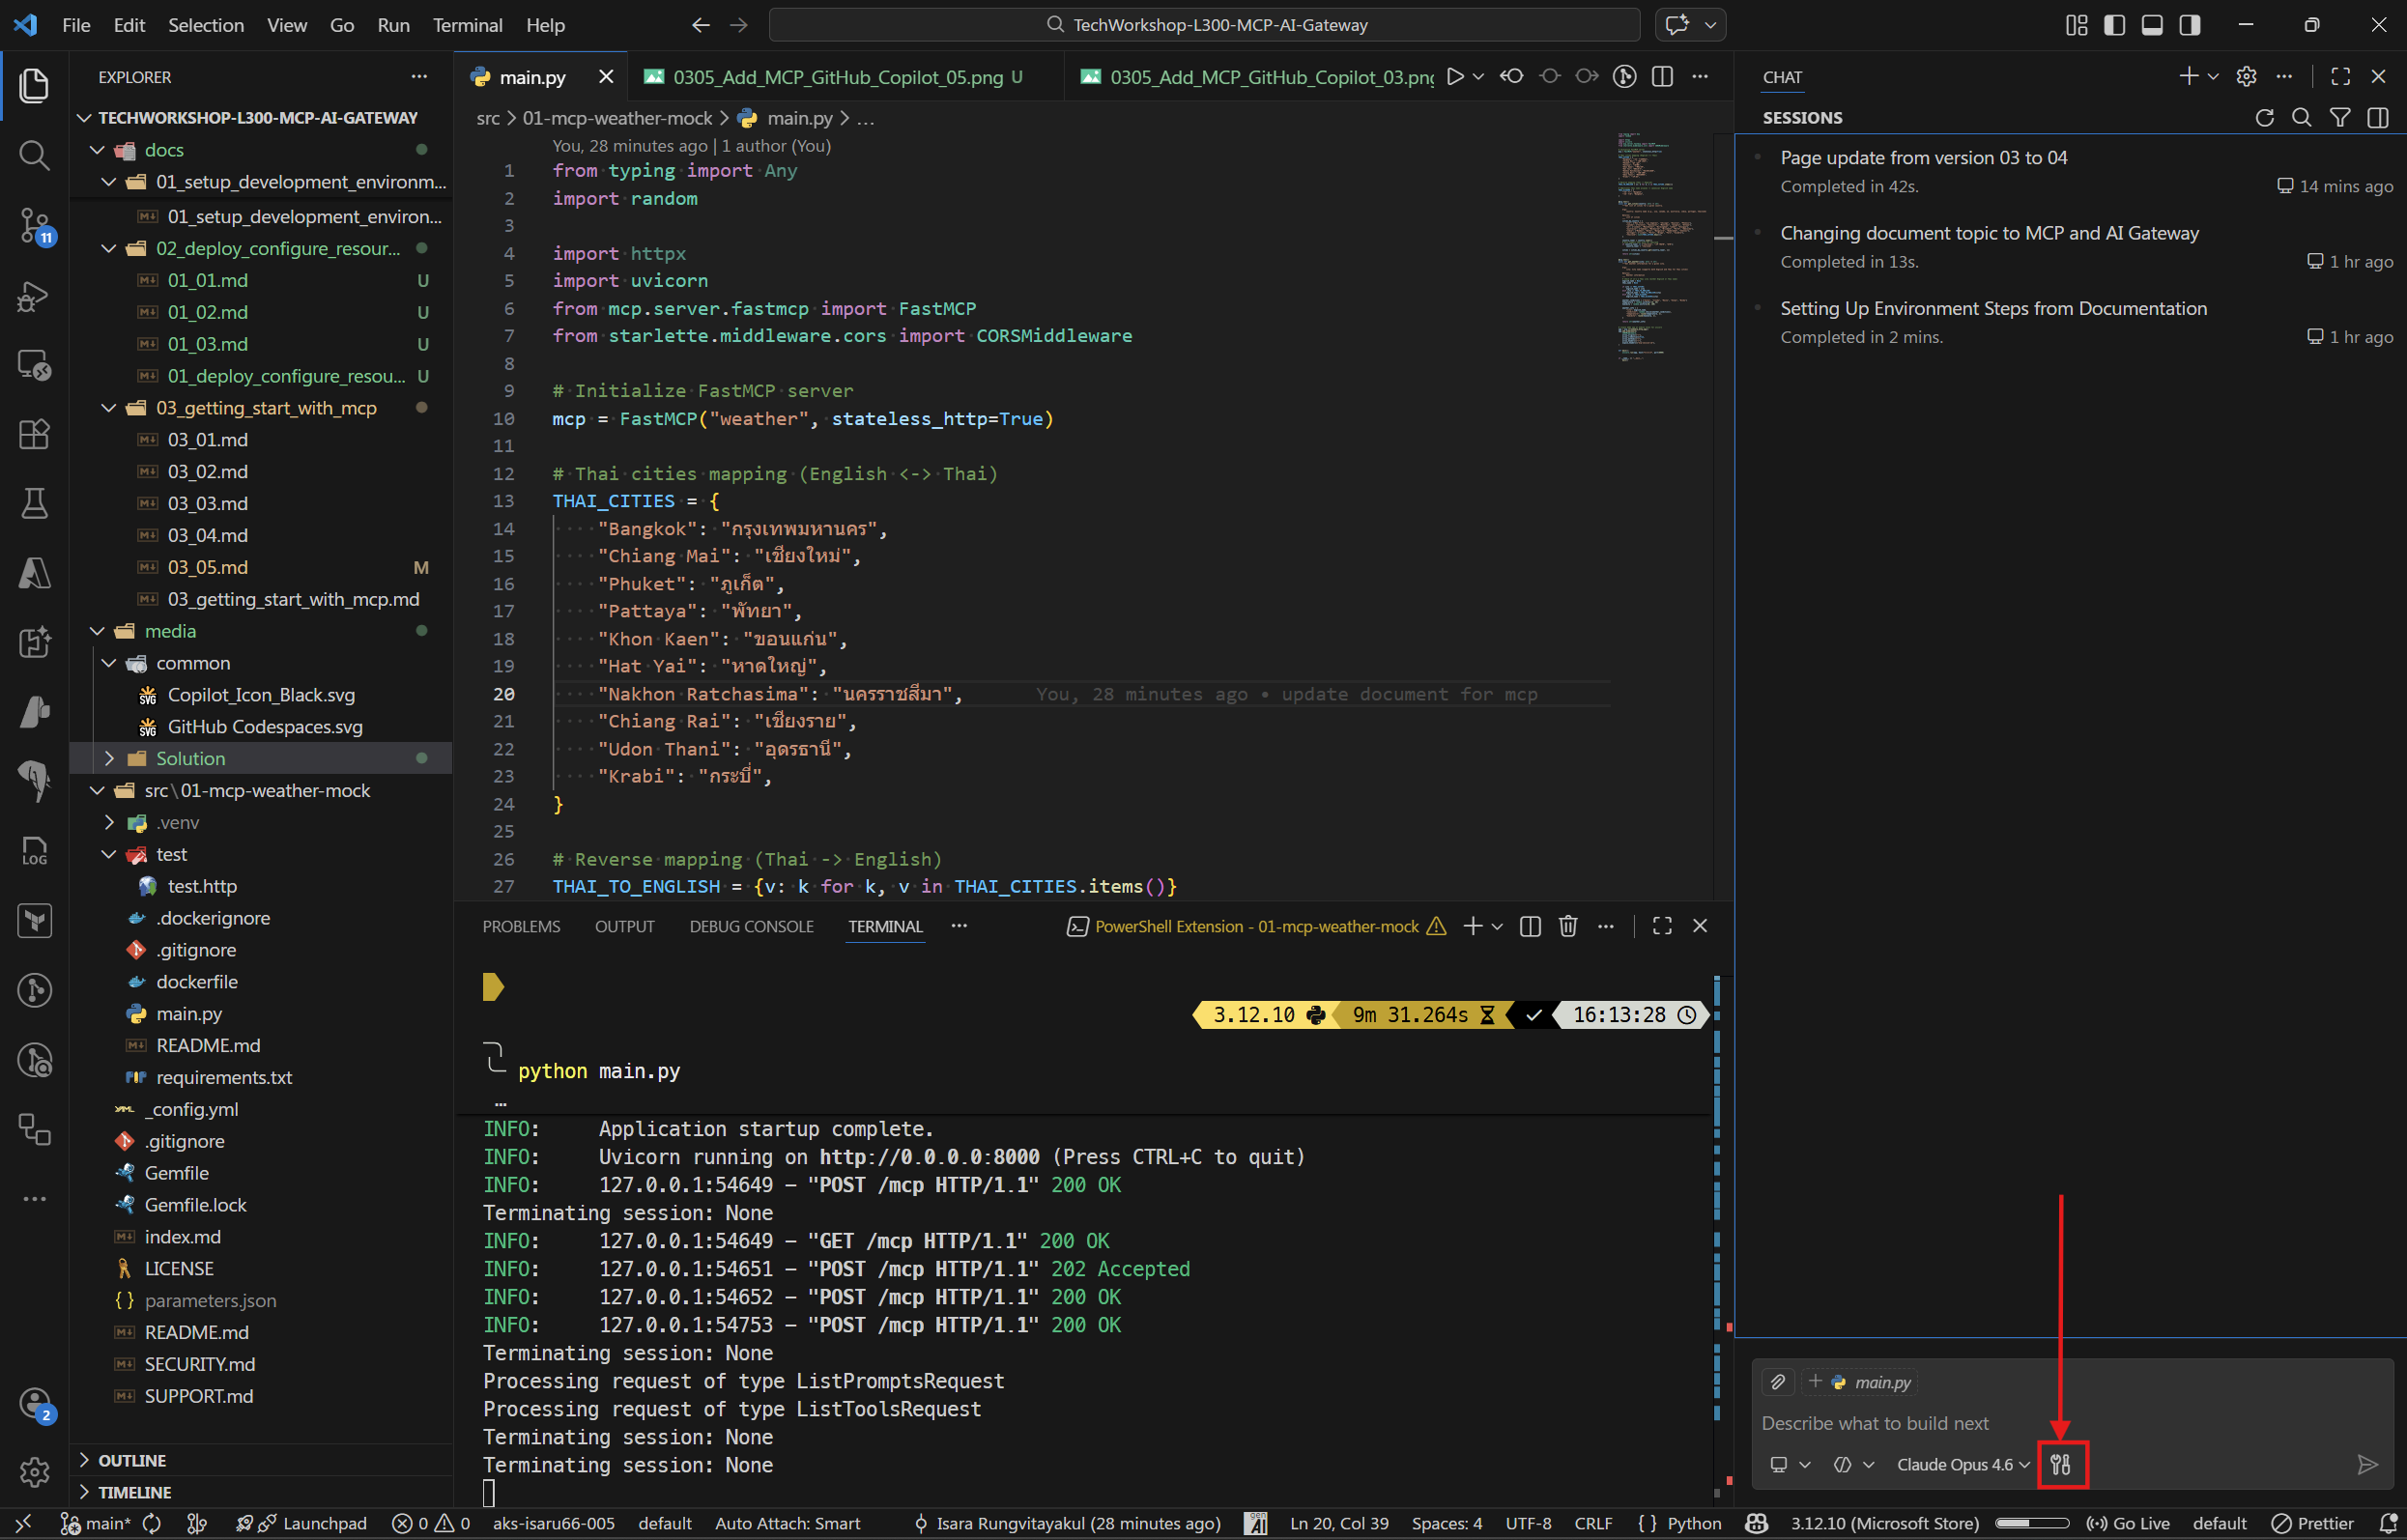 You should see your MCP server here
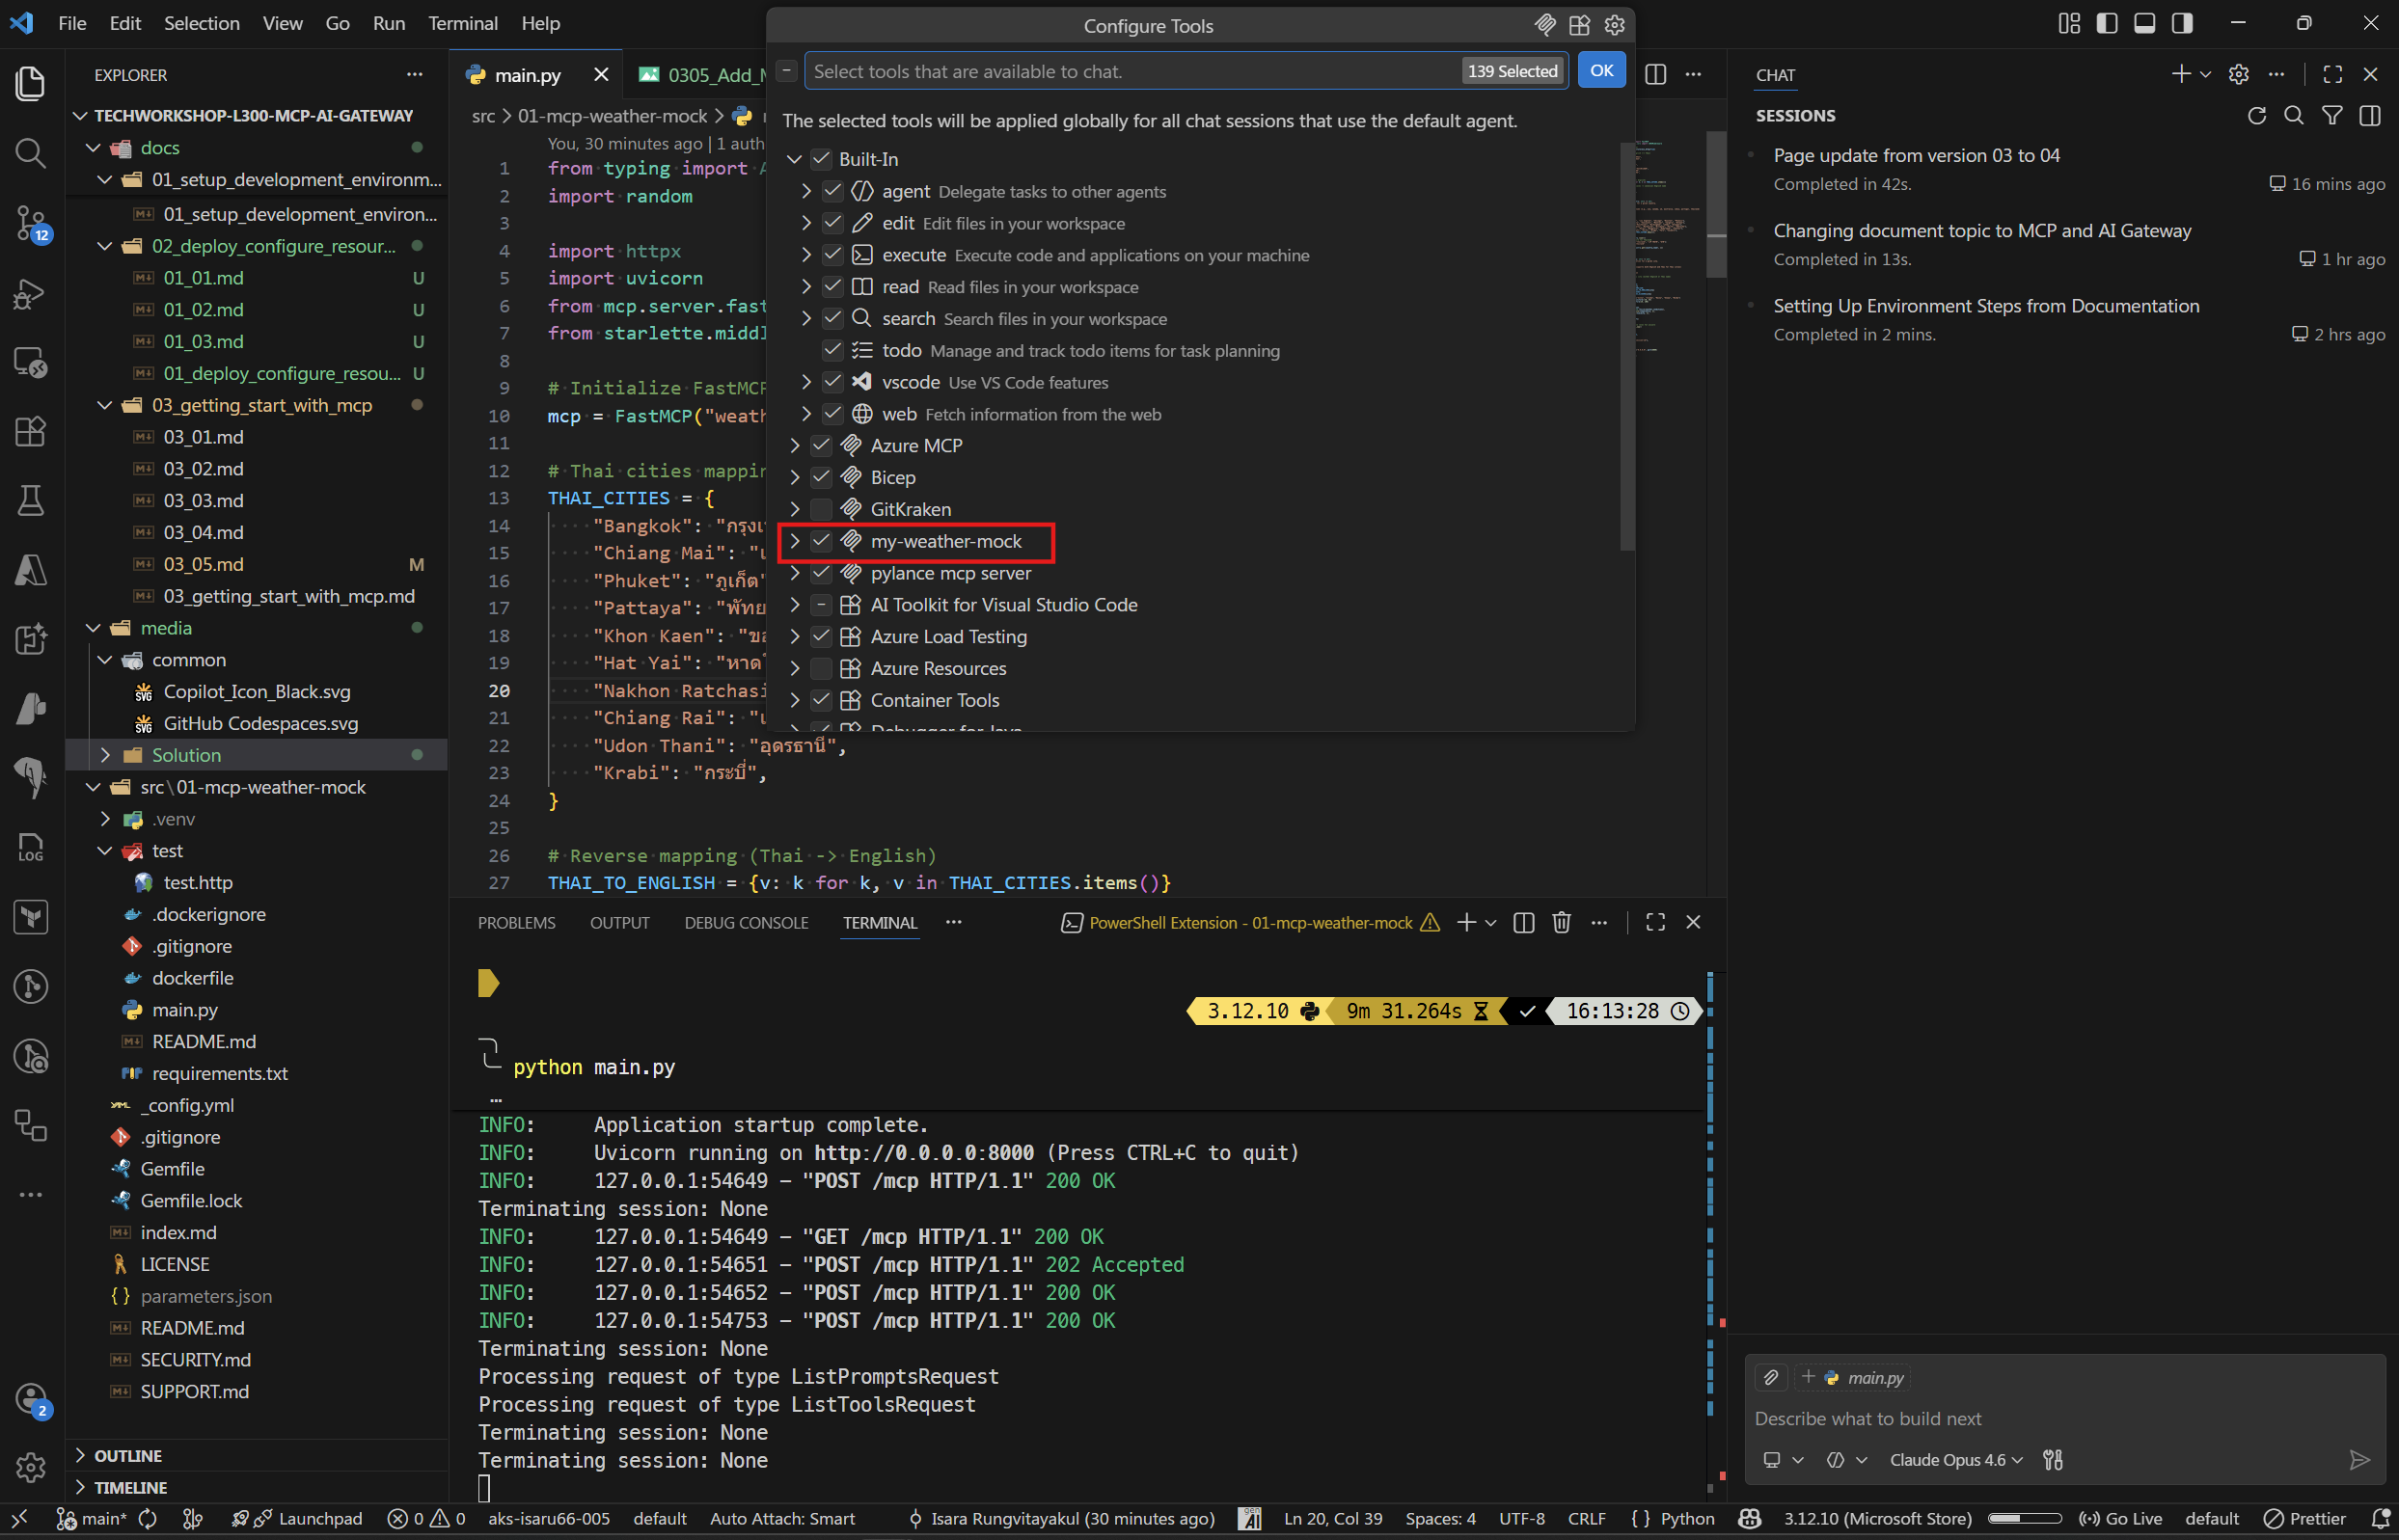
03: Test with GitHub Copilot in agent mode
Use GitHub Copilot Chat to interact with the MCP tools using natural language.
Expand this section to view the solution
- Open Copilot Chat (Ctrl+Shift+I or Cmd+Shift+I).
- Make sure you are in Agent mode (check the mode selector at the bottom of the chat panel — it should say Agent, not Chat or Edit).
- Try asking the following questions:
Example 1: Get cities
What cities are available in Thailand?
Copilot will automatically call the get_cities tool with country: "thailand" and return the list of cities.
Example 2: Get weather
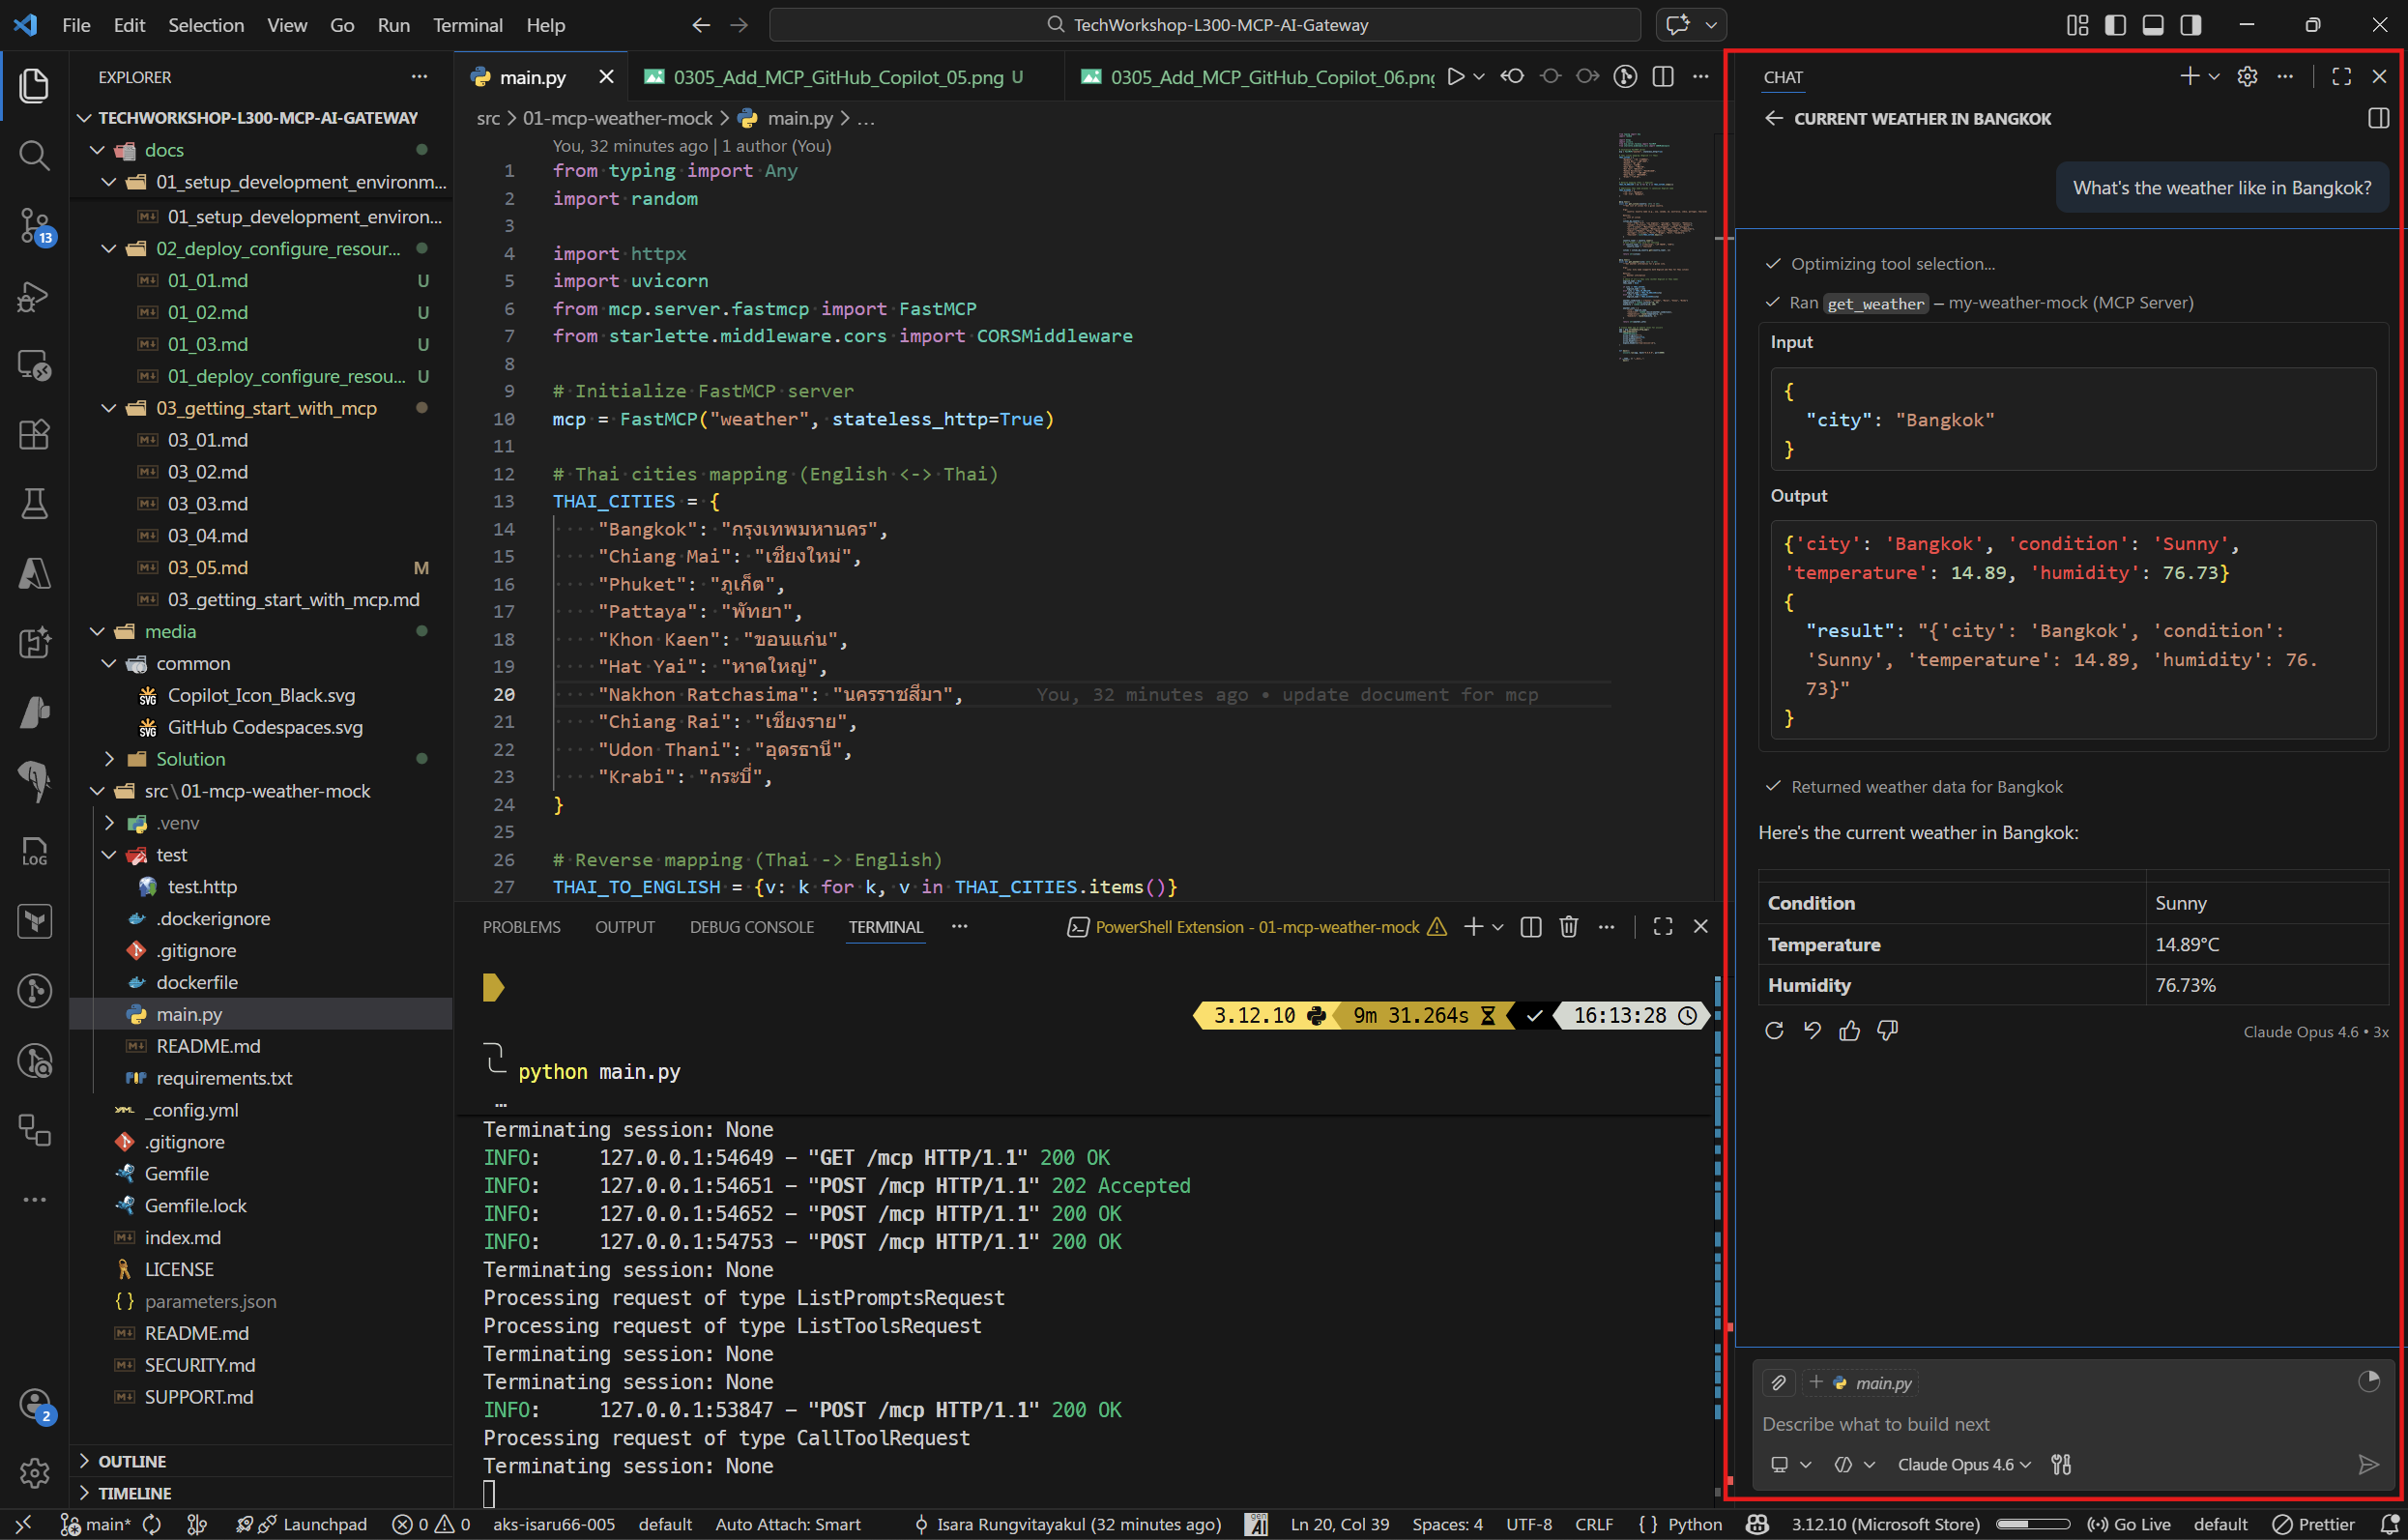
What's the weather like in Bangkok?
Copilot will call the get_weather tool with city: "Bangkok" and present the weather information in a readable format.
Example 3: Multi-step query
Get me the list of cities in the USA and then check the weather for New York.
Copilot will chain multiple tool calls — first calling get_cities for the USA, then calling get_weather for New York.
When Copilot wants to call an MCP tool, it will show a confirmation prompt asking you to Allow or Deny the tool call. Click Allow (or Always Allow for the session) to let Copilot execute the tool.
The weather data is randomly generated by the mock server, so values will vary with each request.
04: Remove the mock MCP server (Optional cleanup)
Once you’ve finished testing with the mock MCP server, you may want to remove it from your VS Code configuration.
Expand this section to view the solution
- Open the Command Palette in VS Code (Ctrl+Shift+P or Cmd+Shift+P).
- Type Preferences: Open Workspace Settings (JSON) and select it.
- Locate the
.vscode/mcp.jsonfile in your workspace or find the MCP server configuration in your settings. - Remove the mock MCP server entry from the
serversobject.
For example, if your .vscode/mcp.json looks like this:
{
  "servers": {
    "my-weather-mock": {
      "type": "http",
      "url": "http://localhost:8000/mcp"
    }
  }
}
Delete the "my-weather-mock" entry or the entire file if it’s no longer needed.
Alternatively, you can:
- Open the Command Palette and type MCP: List Servers.
- Find your mock server in the list.
- Click the Remove or Delete button next to the server name.
After removal, the MCP tools from this server will no longer appear in GitHub Copilot’s available tools list.